Valora + Wallet Connect v1
The tutorial shows how you can use Wallet Connect version 1 in a DApp to connect to Valora. In this example, we will demonstrate how to add Wallet Connect to a simple React app.
This is a simple DApp that focuses on demonstrating how to connect Wallet Connect to Valora, but also shows how to set up ContractKit and make a simple cUSD transfer. You can view the DApp code here.
Add Packages#
Add the packages that you need to your project.
yarn add @wallet-connect/web3-provider web3 @celo/contractkitImport the packages to your project code.
import WalletConnectProvider from '@walletconnect/web3-provider';import Web3 from 'web3';import { newKitFromWeb3 } from '@celo/contractkit';Connect#
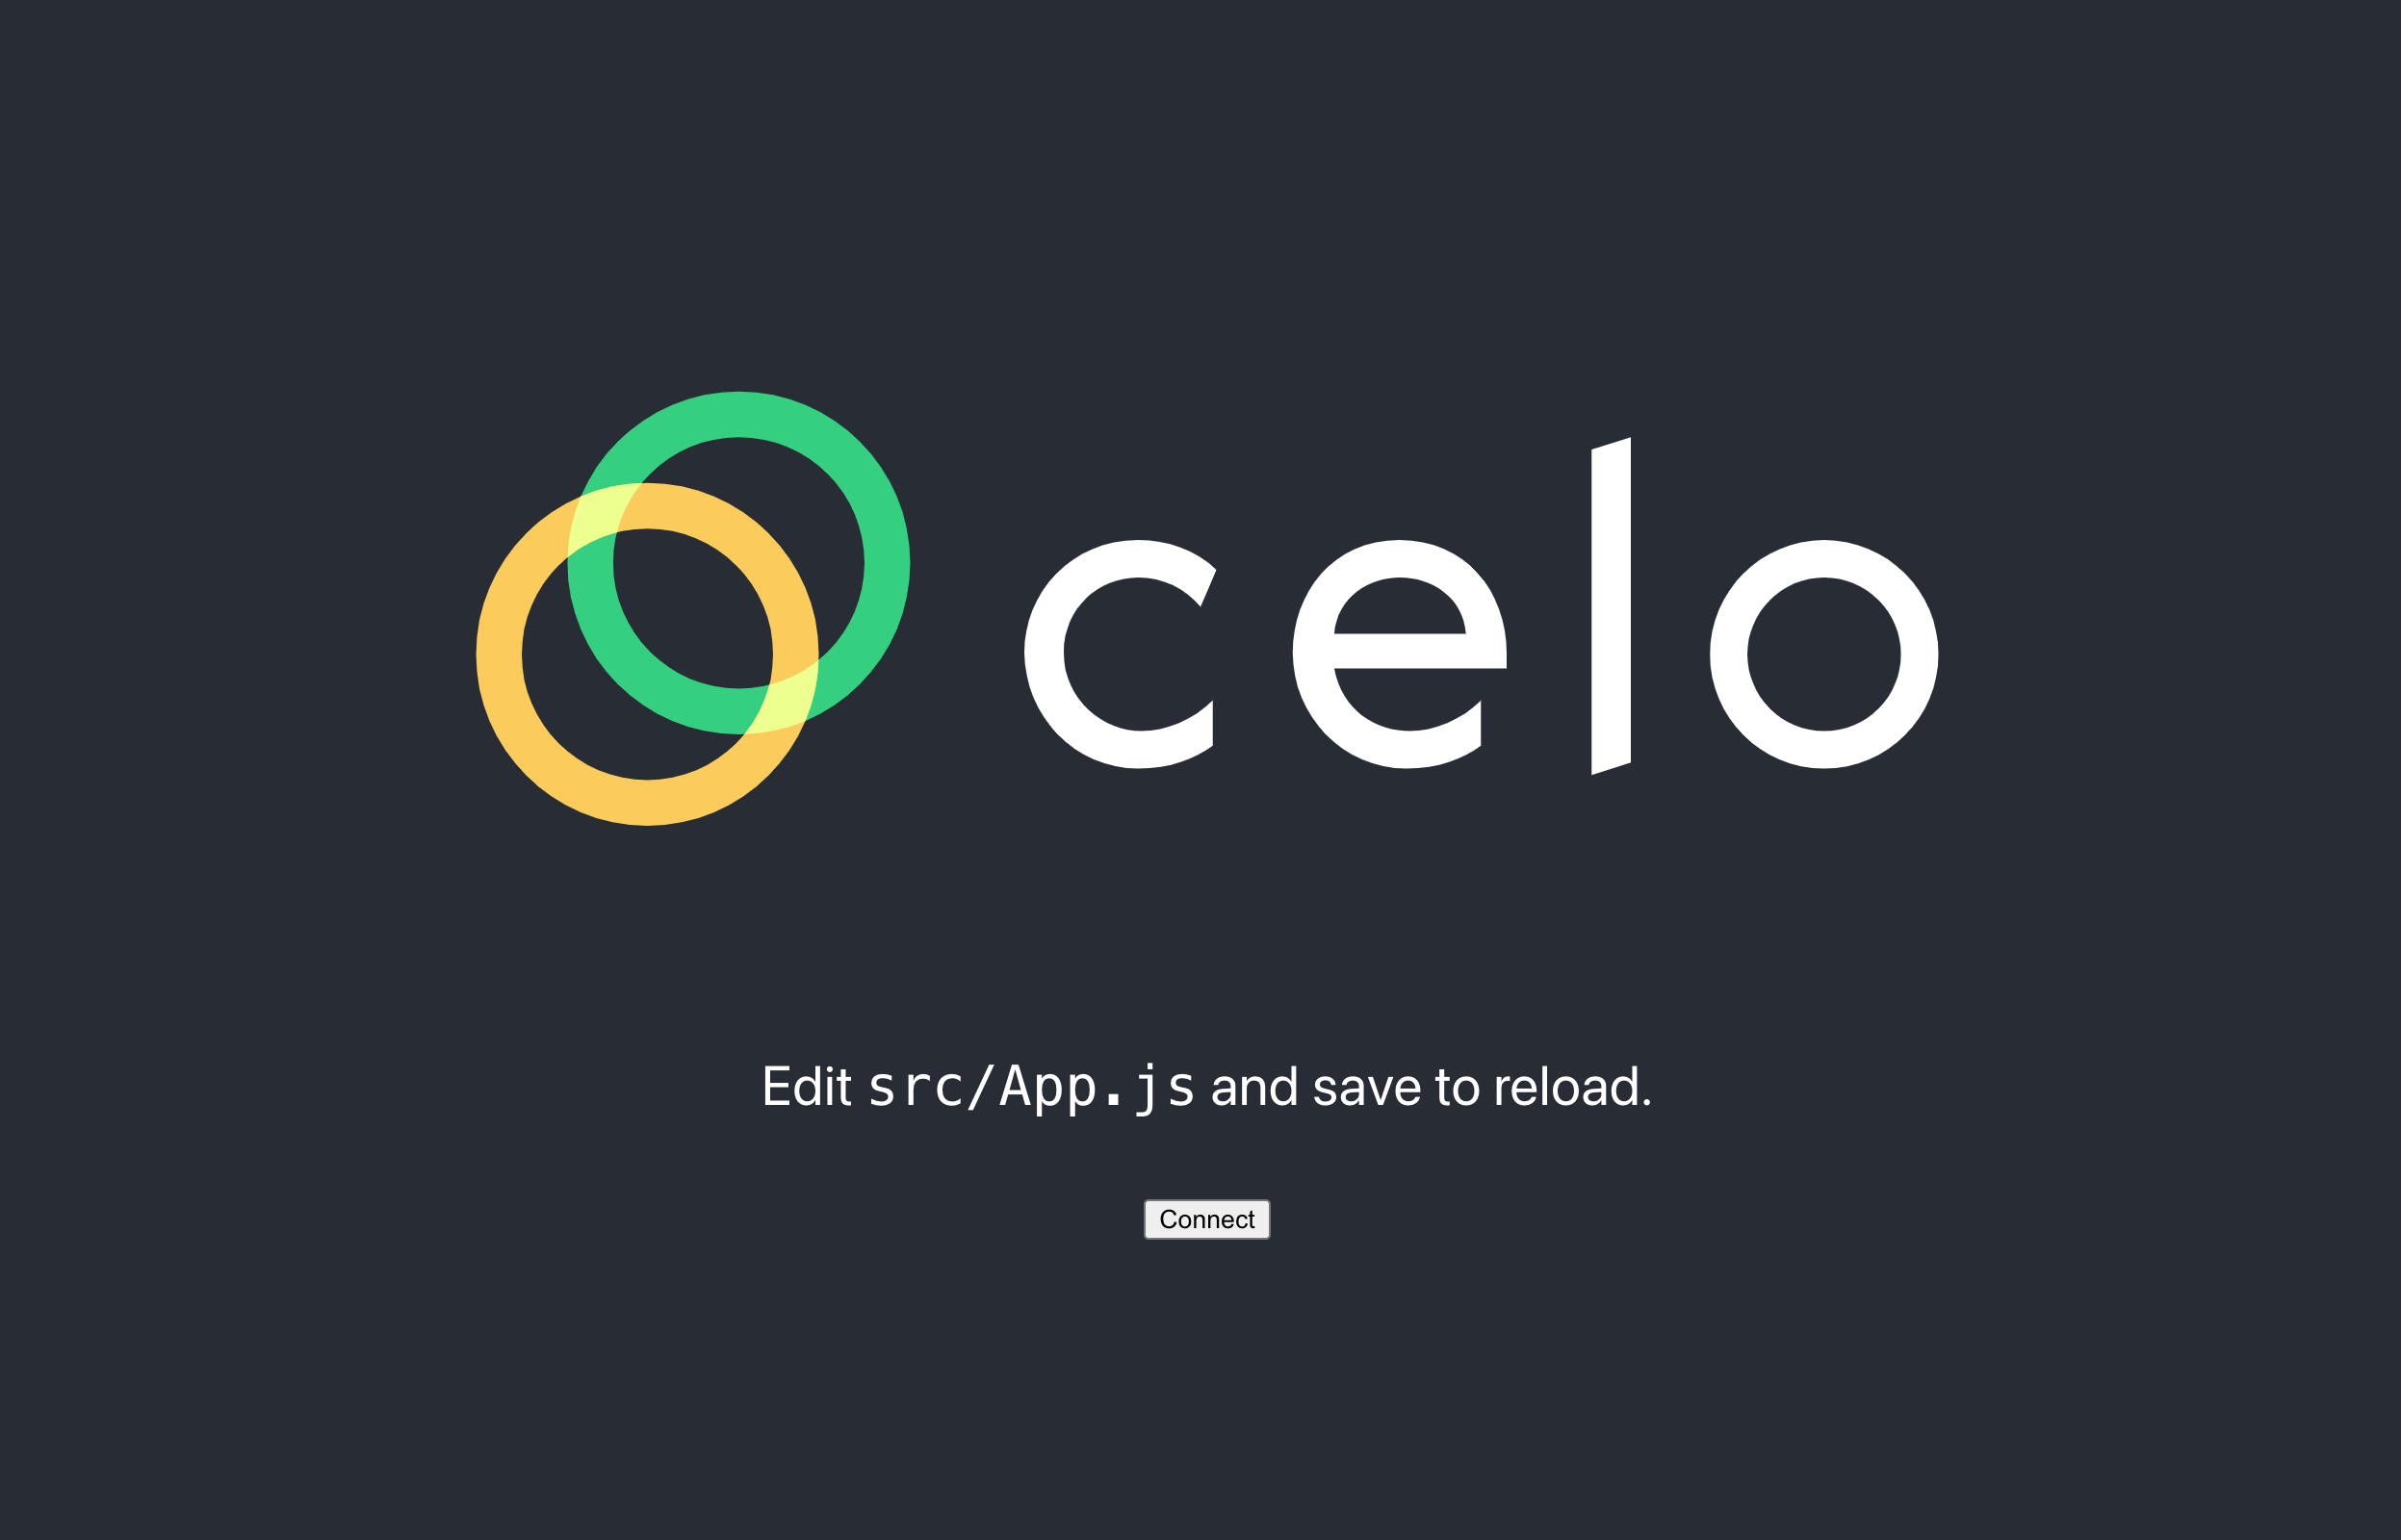
If the DApp does not detect a wallet connect provider, the user will be presented with a button to initiate a wallet connection.
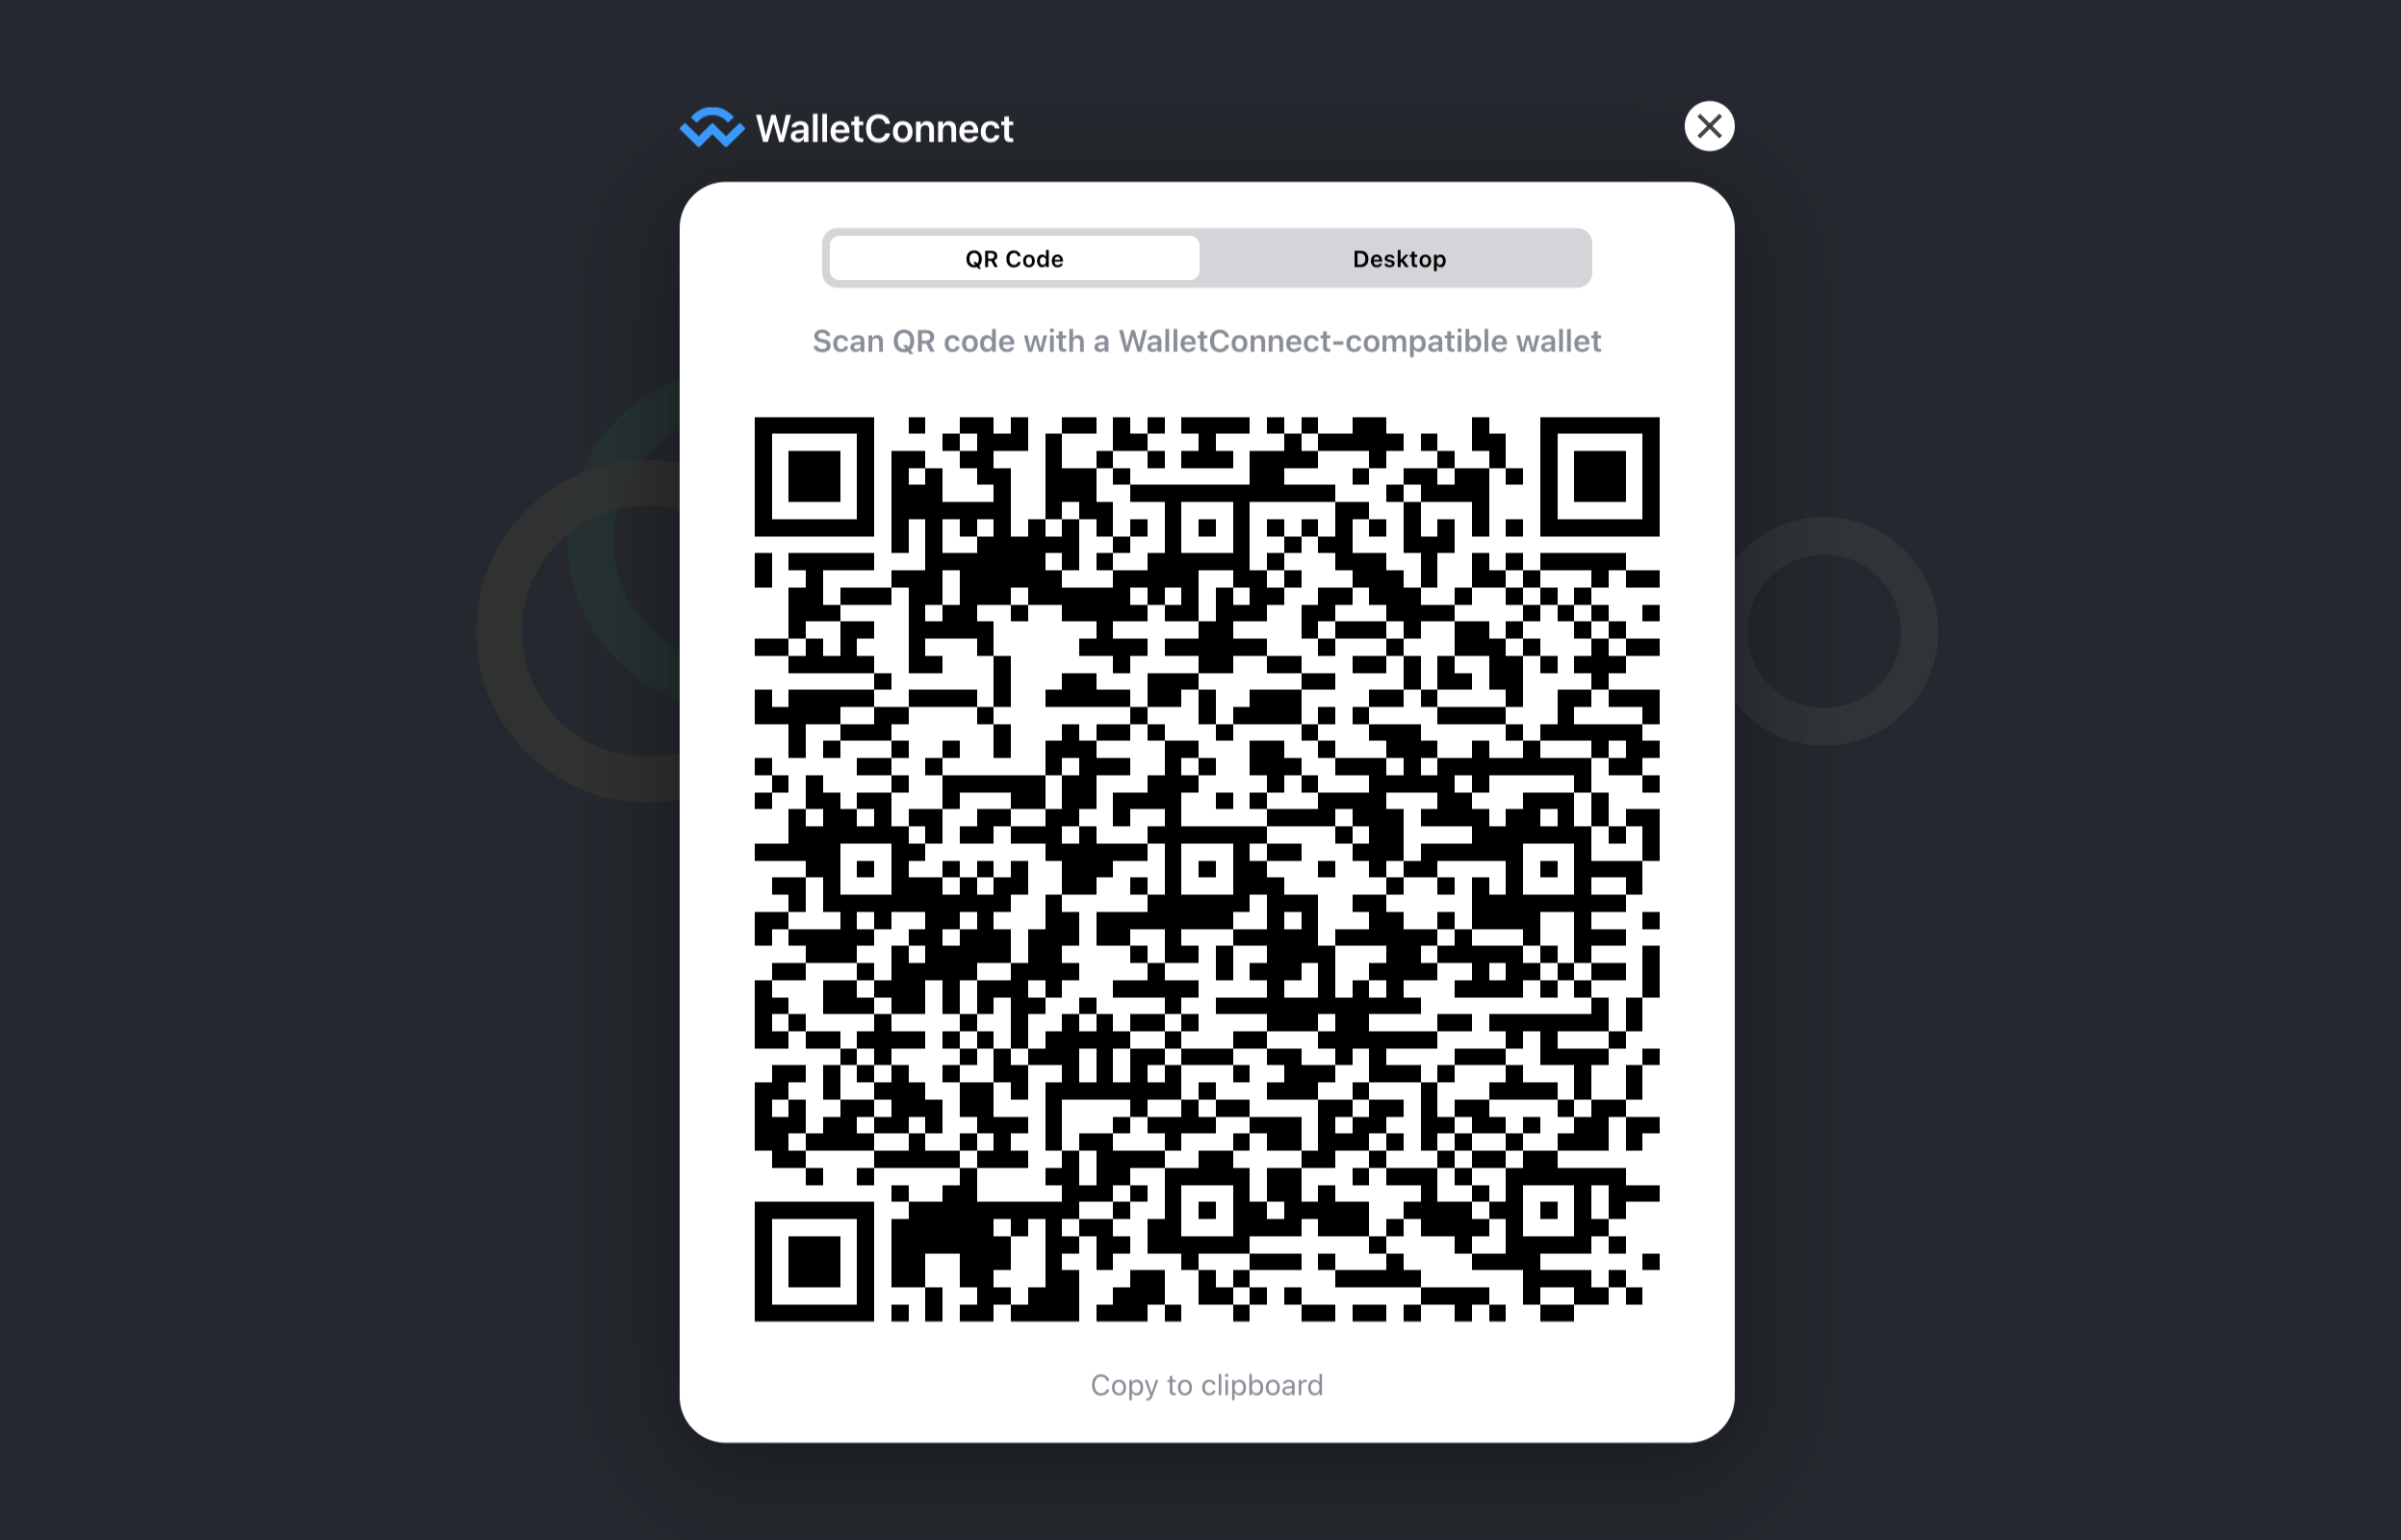
If the DApp is being accessed on a computer or device other than the mobile device with the wallet, the user can connect to the mobile wallet by scanning the presented QR code. If the DApp is being accessed on the same device as the wallet, the connection will be made via the appropriate linking mechanism (iOS and Android are different). You can read more about that here.
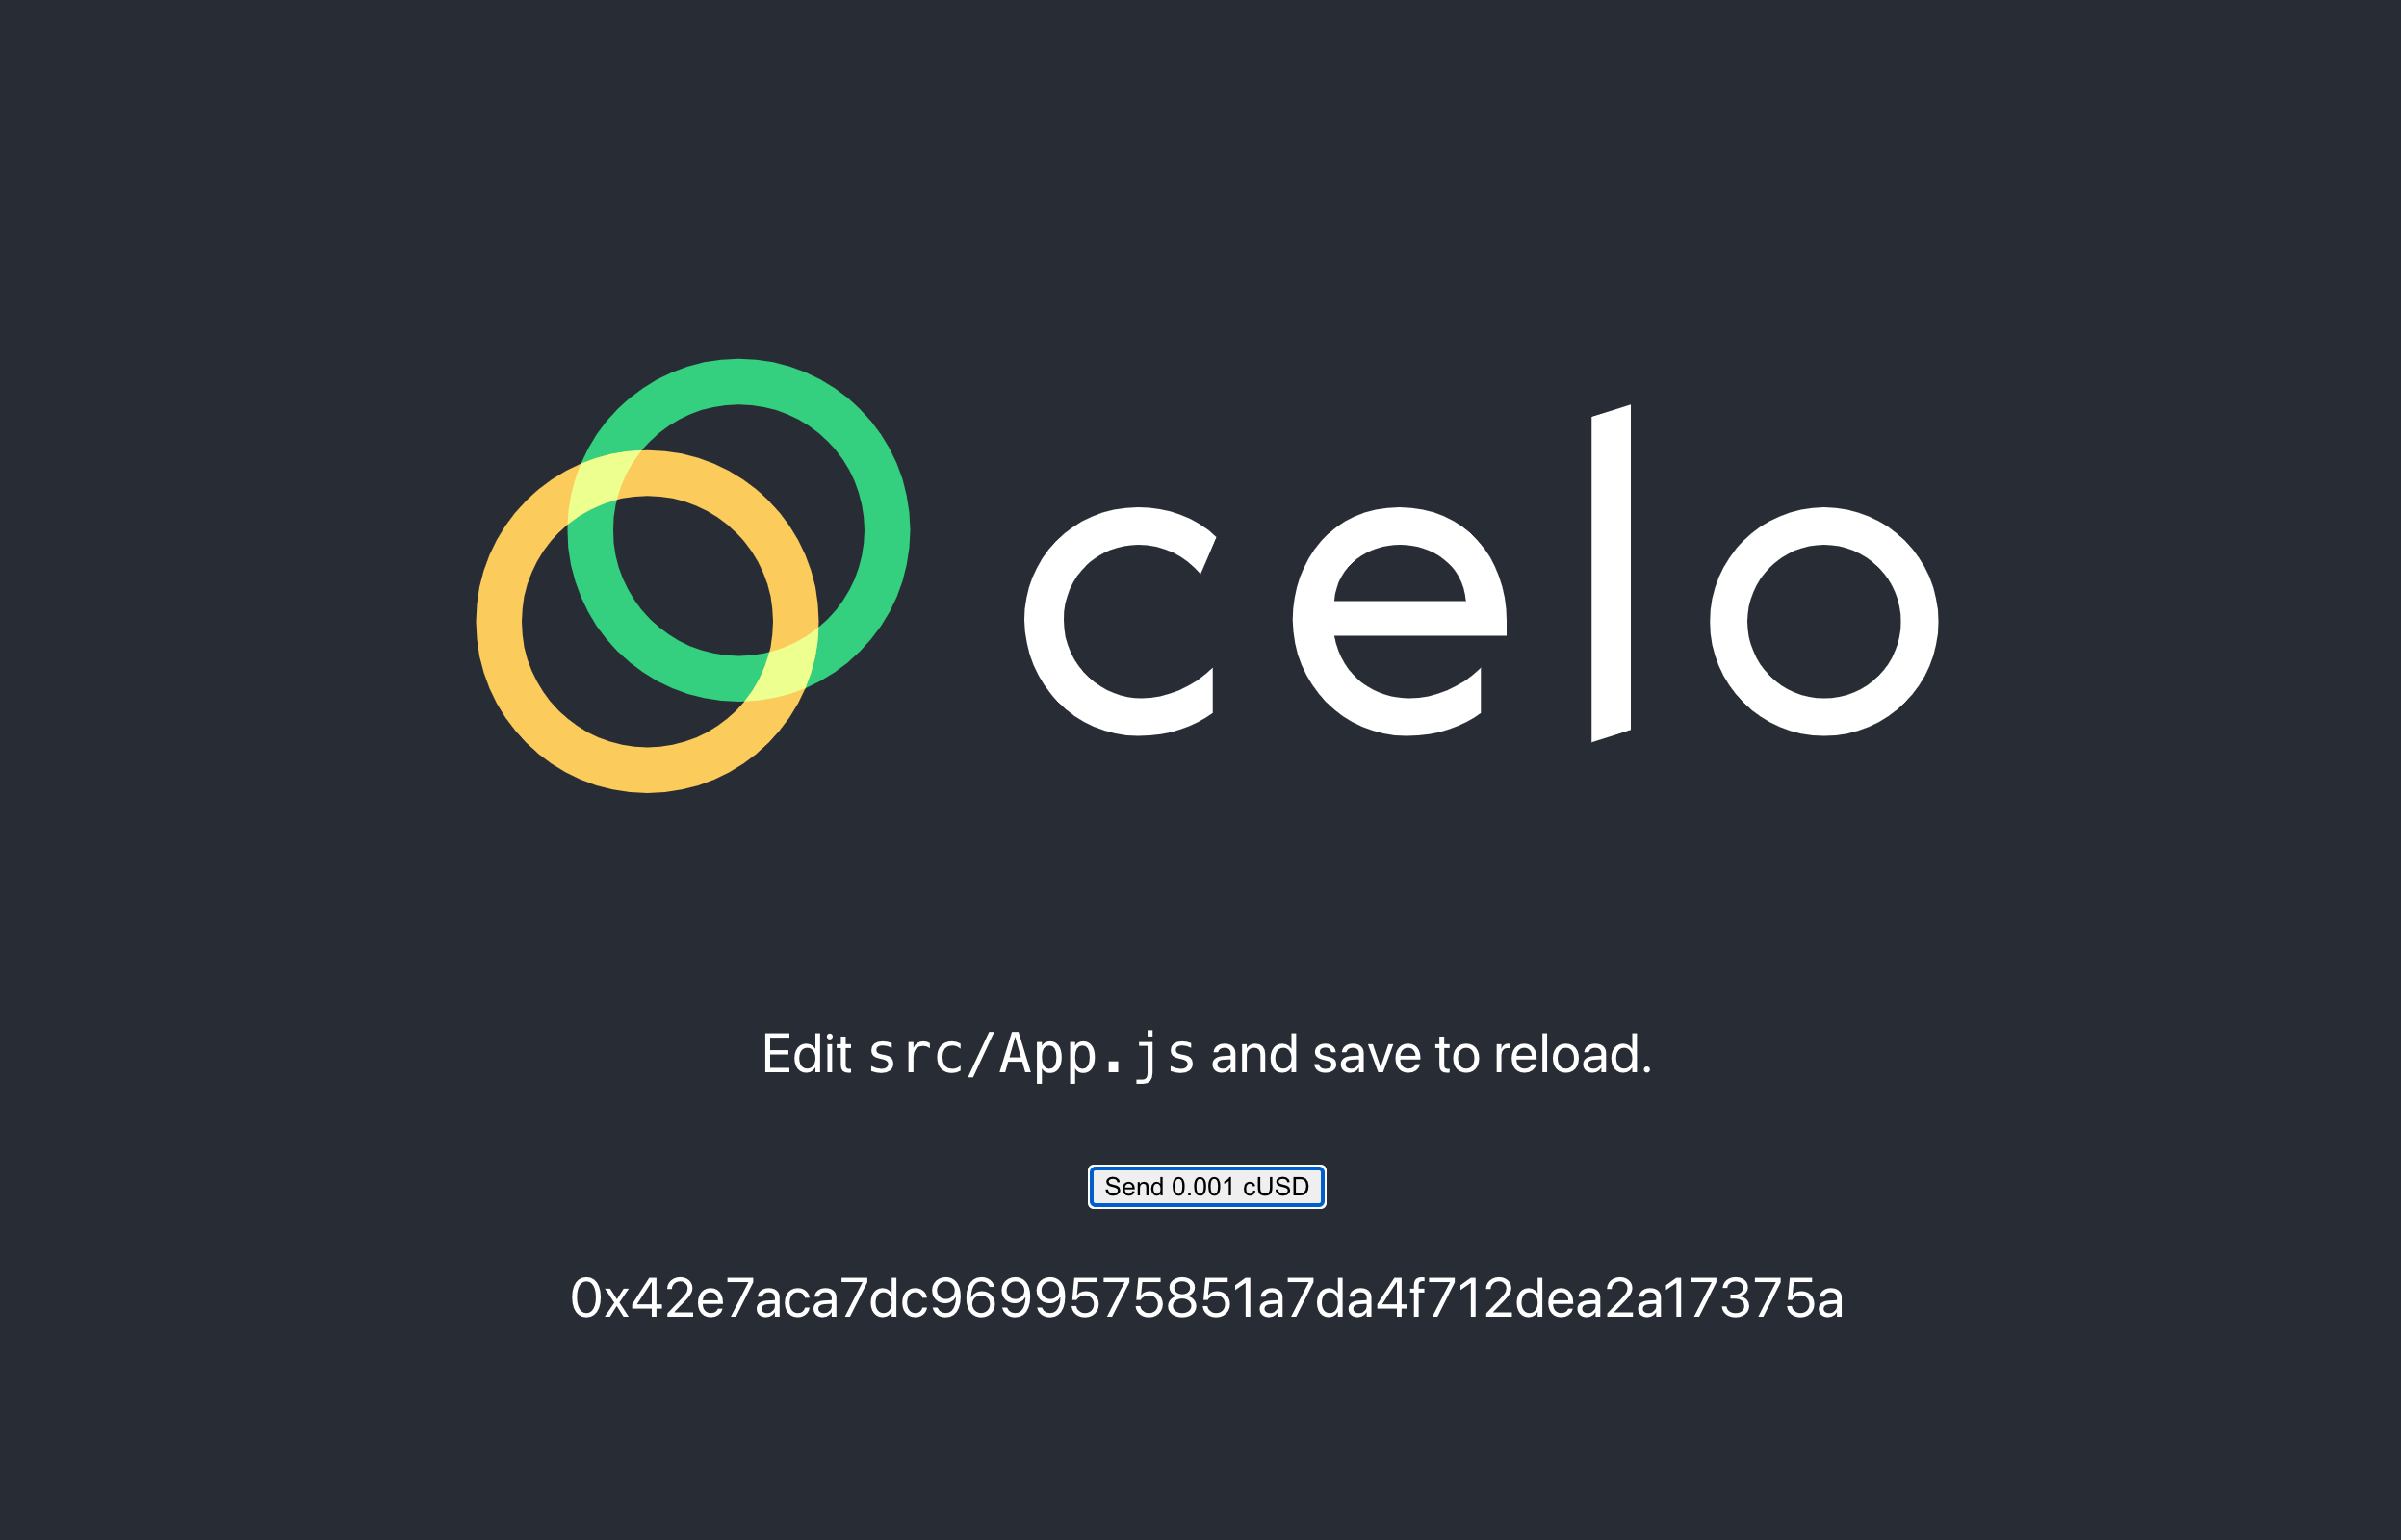
When a provider is detected, the DApp will show a button to send some cUSD.
The connect function sets up the Wallet Connect Provider and initializes ContractKit with the provider and user account. It also sets up a listener that will log when the user changes accounts. The DApp then saves the provider and initialized Contractkit in the React component state.
 connect = async() => {    const provider = new WalletConnectProvider({      rpc: {        44787: "https://alfajores-forno.celo-testnet.org",        42220: "https://forno.celo.org",      },    });
    await provider.enable()    const web3 = new Web3(provider);    let kit = newKitFromWeb3(web3)
    kit.defaultAccount = provider.accounts[0]
    provider.on("accountsChanged", (accounts) => {      console.log(accounts);    });
this.setState({provider, kit}) }DApp:
Valora:
When the provider has been set and the DApp is connected to Valora, the UI will update the button and display the user account address below.
Send cUSD#
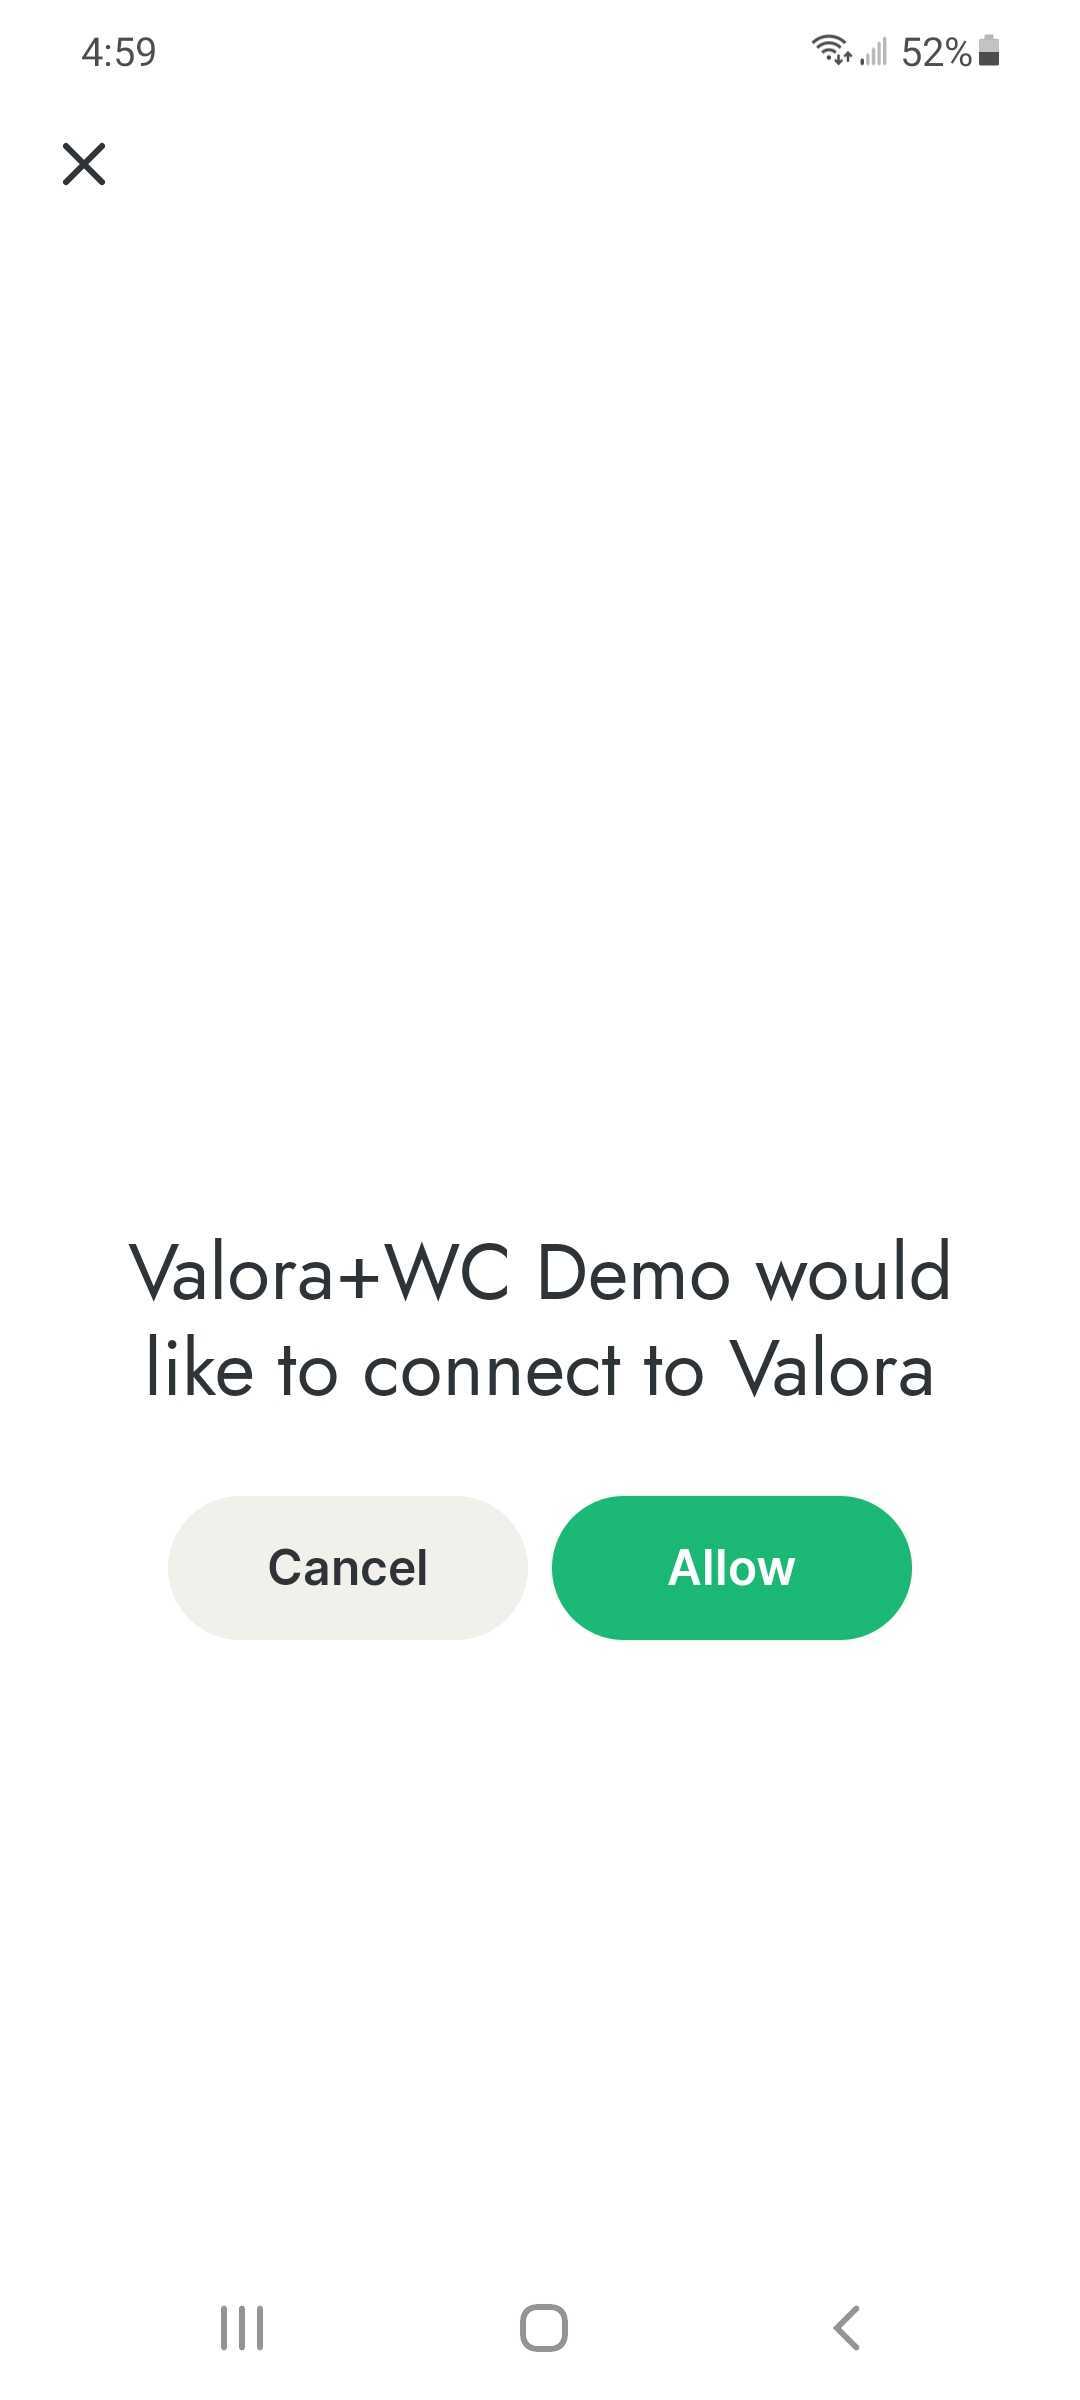
Clicking the new button will prompt the user to send 0.001 cUSD to a hard-coded address. The user will have to click Allow to send the transaction. Once the transaction is confirmed, the transaction receipt will be printed in the DApp browser console.
You can code the transaction approval request with just a few lines, demonstrated in the sendcUSD function.
- Get the saved instance of ContractKit from
this.state.kit - Get the stabletoken (cUSD) contract
- Call
transferandsendwith the recipient and amount
 sendcUSD = async () => {    let kit = this.state.kit
    let amount = kit.web3.utils.toWei('0.001', 'ether')
    const stabletoken = await kit.contracts.getStableToken()    const tx = await stabletoken.transfer(this.state.someAddress, amount).send()    const receipt = await tx.waitReceipt()
    console.log(receipt)  }

The receipt will be logged once the user approves the transaction and it is confirmed on the network.