Deploy an NFT to Celo
In this tutorial, we will go over how to deploy ERC721 tokens (NFTs) on the Celo network using autogenerated code. In this example, we will be using IPFS for off-chain storage, but you can use whatever off-chain storage mechanism you want.
Set up your wallet#
- Install Metamask.
- Add the Celo network to Metamask. We suggest adding the Alfajores testnet to Metamask as well, so you can test contract deployments before deploying to mainnet.
- Add a small amount of CELO to your Metamask account. In this example, we will deploy to the Alfajores testnet, so we need Alfajores CELO, which you can get from the faucet here.
Prepare the NFT metadata#
- Go to https://app.pinata.cloud/ and sign up for an account if you don’t have one already. Pinata is a service that allows you to easily upload files to IPFS.
- Upload your NFT images to IPFS. Because storing data on a blockchain can be expensive, NFTs often reference off-chain data. In this example, We are creating a set of NFTs that reference pictures of trees. We uploaded all of the images of trees to IPFS individually. The names of the images correspond to the token ID. This isn’t necessary, we just did it for convenience. Notice that each image has a corresponding CID hash, this is the unique identifier for that file or folder.
- Once all of your images have been uploaded, you will need to prepare the token metadata in a new folder.
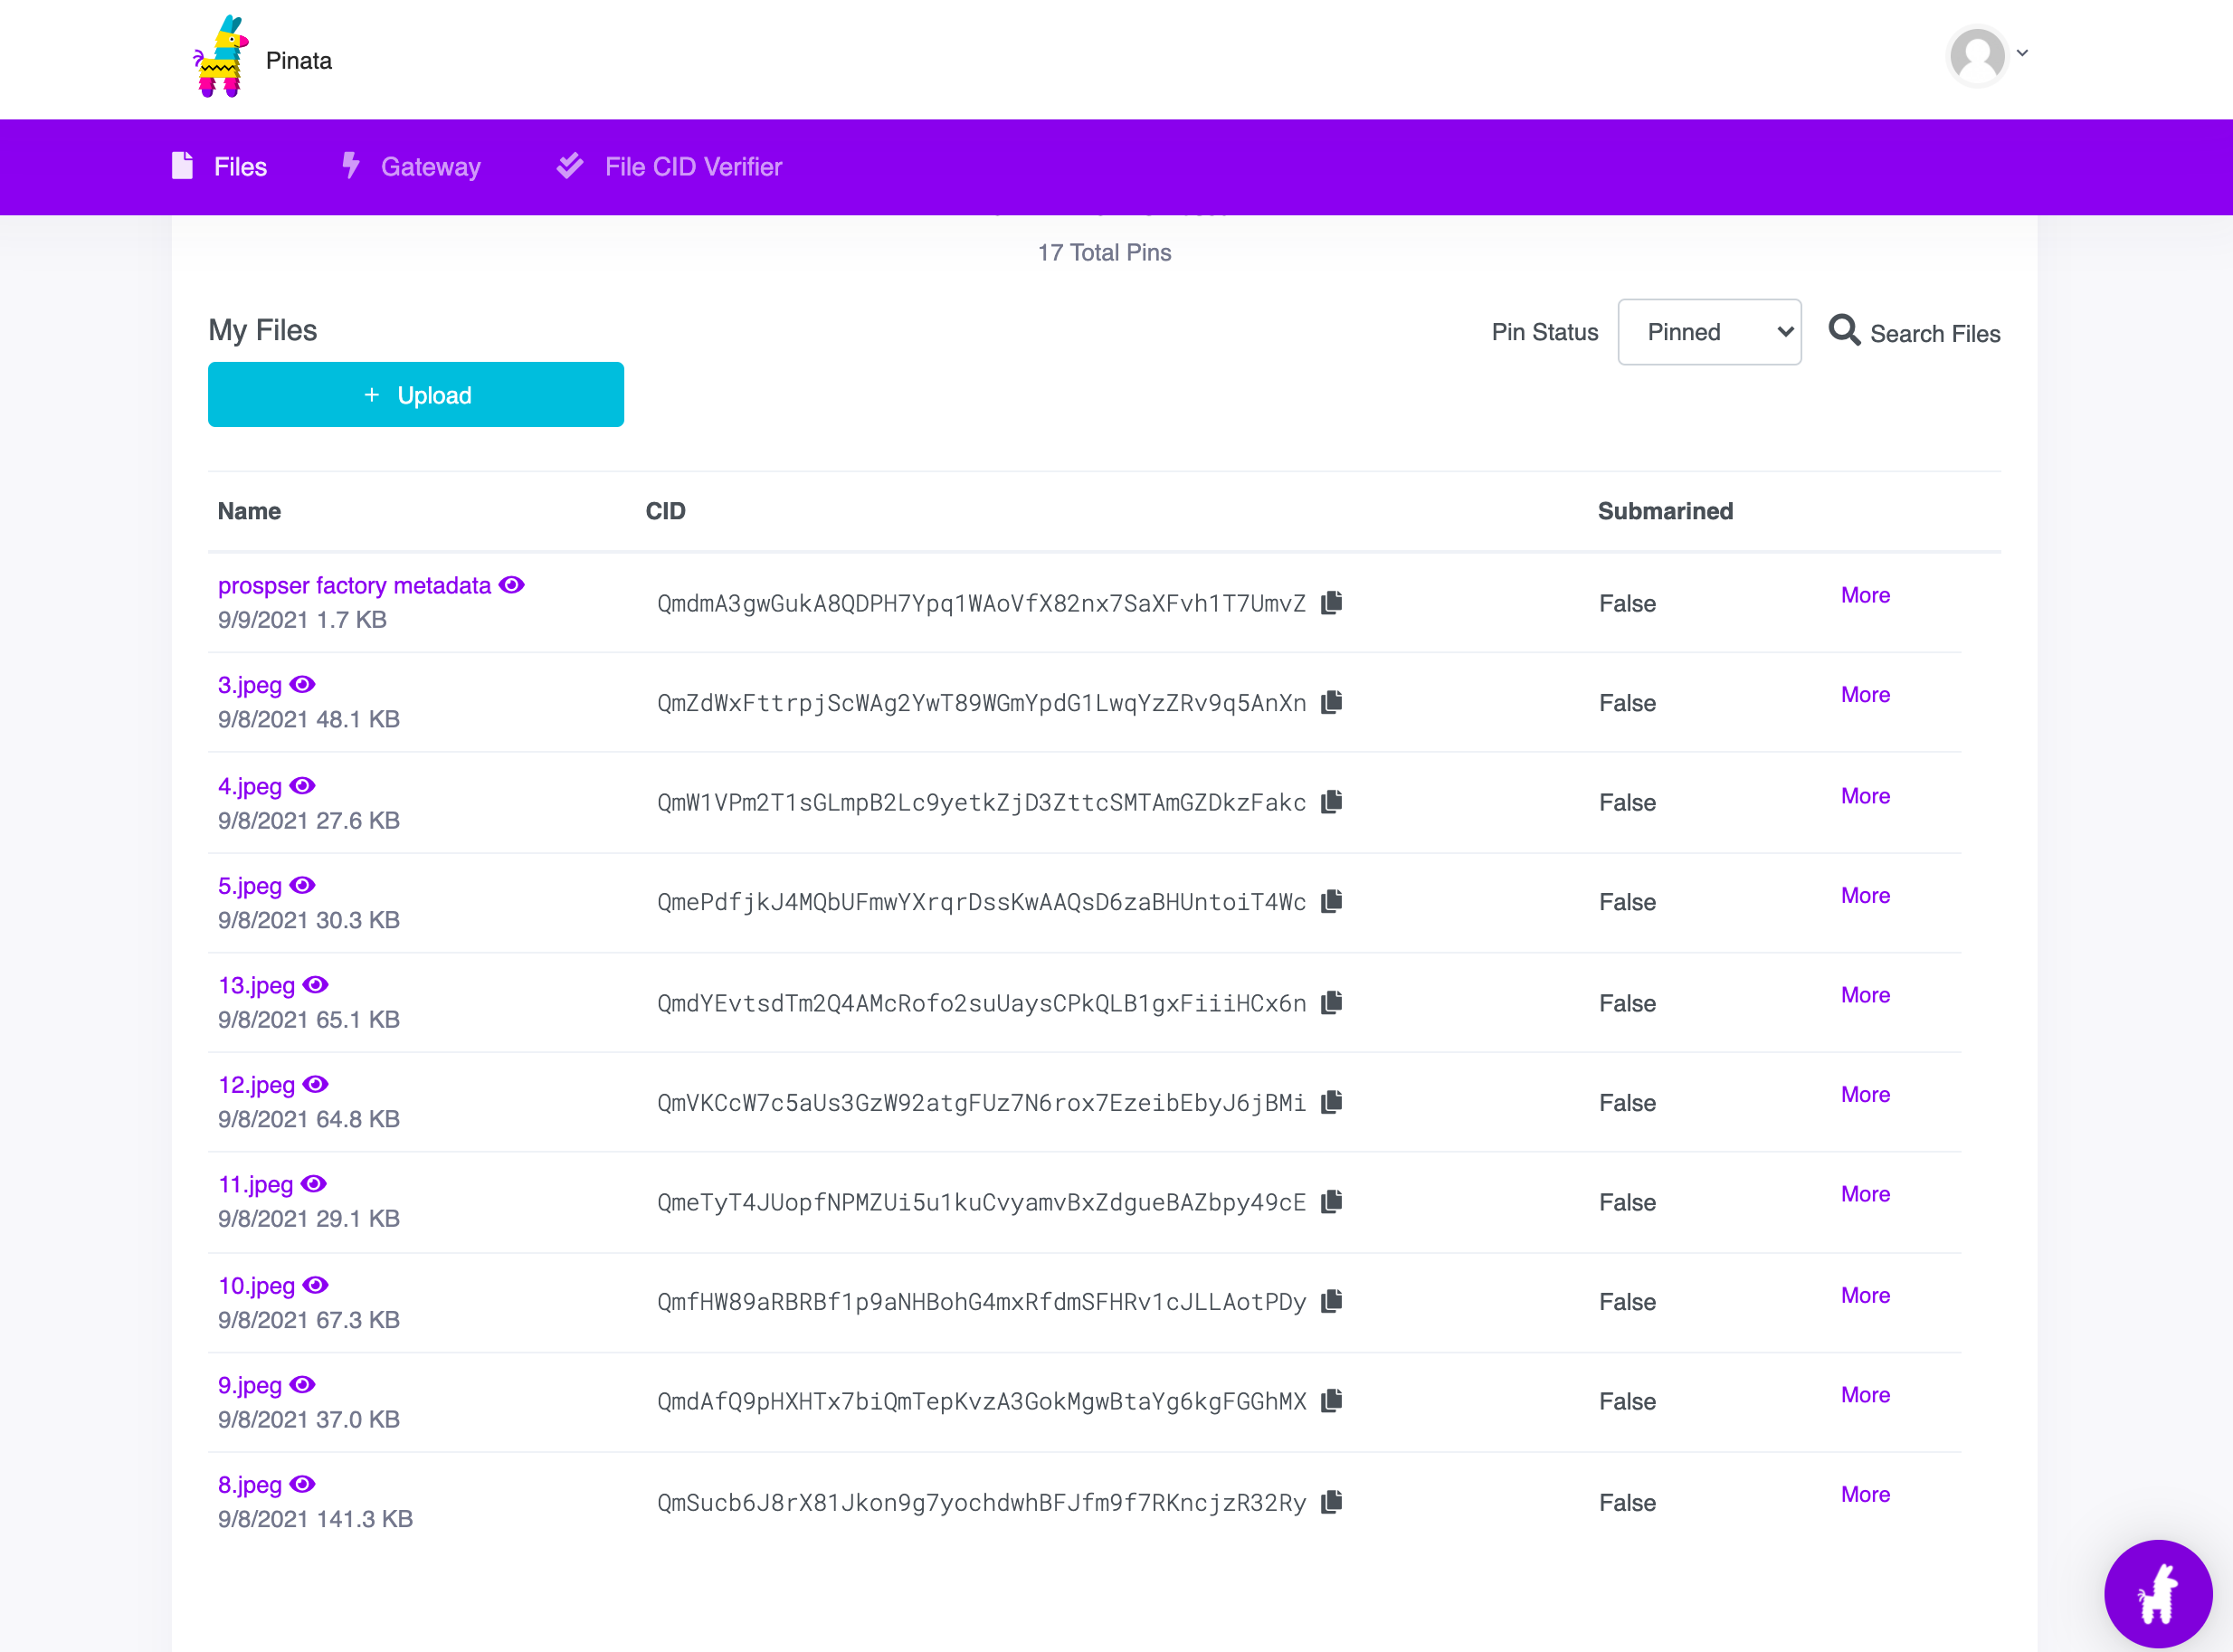
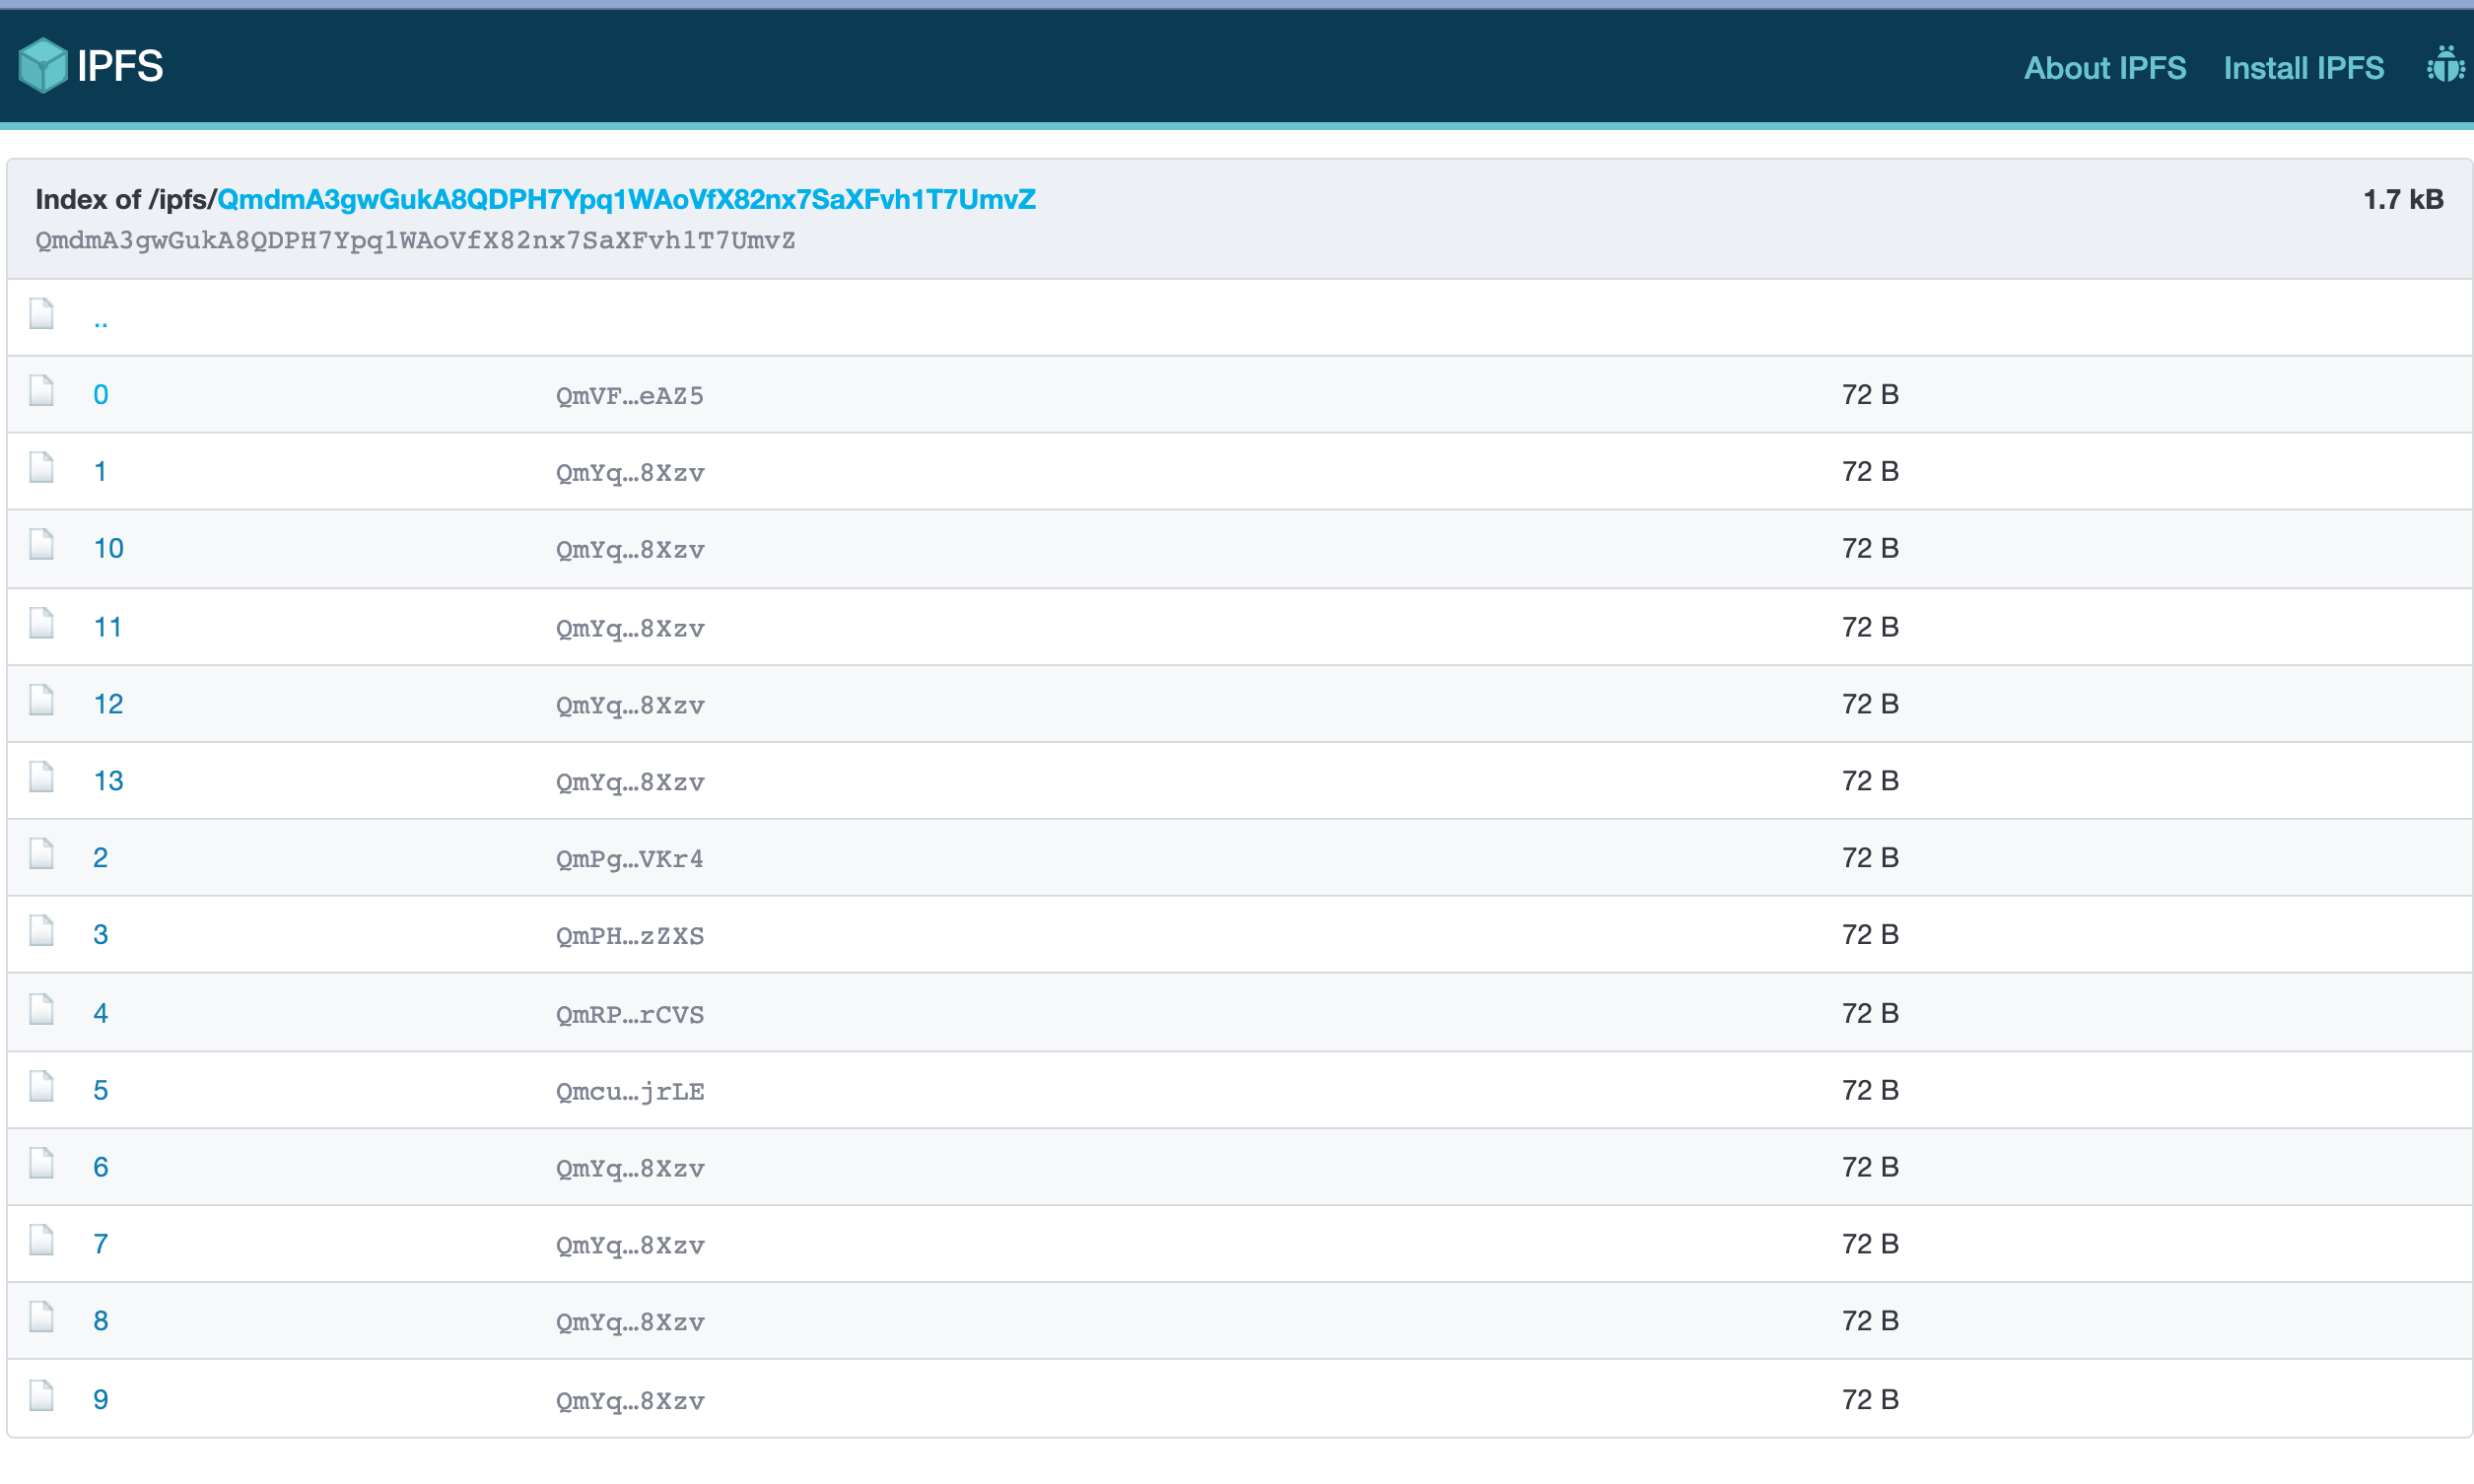
- We created a folder called “prosper factory metadata”. You can view the contents of the folder here. The folder contains 14 files, numbered 0-13. The names of these files are important. These file names correspond to the token ID of each NFT that will be created by the contract. Make sure that there are no extensions (.txt, .json, .jpeg, .png) on your files.
- Click on one of the files. The files contain the NFT metadata. In this simple example, the metadata only contains a reference to the unique tree image. You can view the image in a browser that supports IPFS (we are using Brave) here. Each file should have a unique image reference.
 You will need to create a similarly structured folder containing metadata for all of the NFTs that you want to create.
- We created a folder called “prosper factory metadata”. You can view the contents of the folder here. The folder contains 14 files, numbered 0-13. The names of these files are important. These file names correspond to the token ID of each NFT that will be created by the contract. Make sure that there are no extensions (.txt, .json, .jpeg, .png) on your files.
- Upload the folder containing all of the token metadata to IPFS. This will make your NFT data publicly available. We called ours “prosper factory metadata”. Note the CID of this folder. We will need it shortly.

Design and Deploy the Smart Contracts#
- Go to https://docs.openzeppelin.com/contracts/4.x/wizard
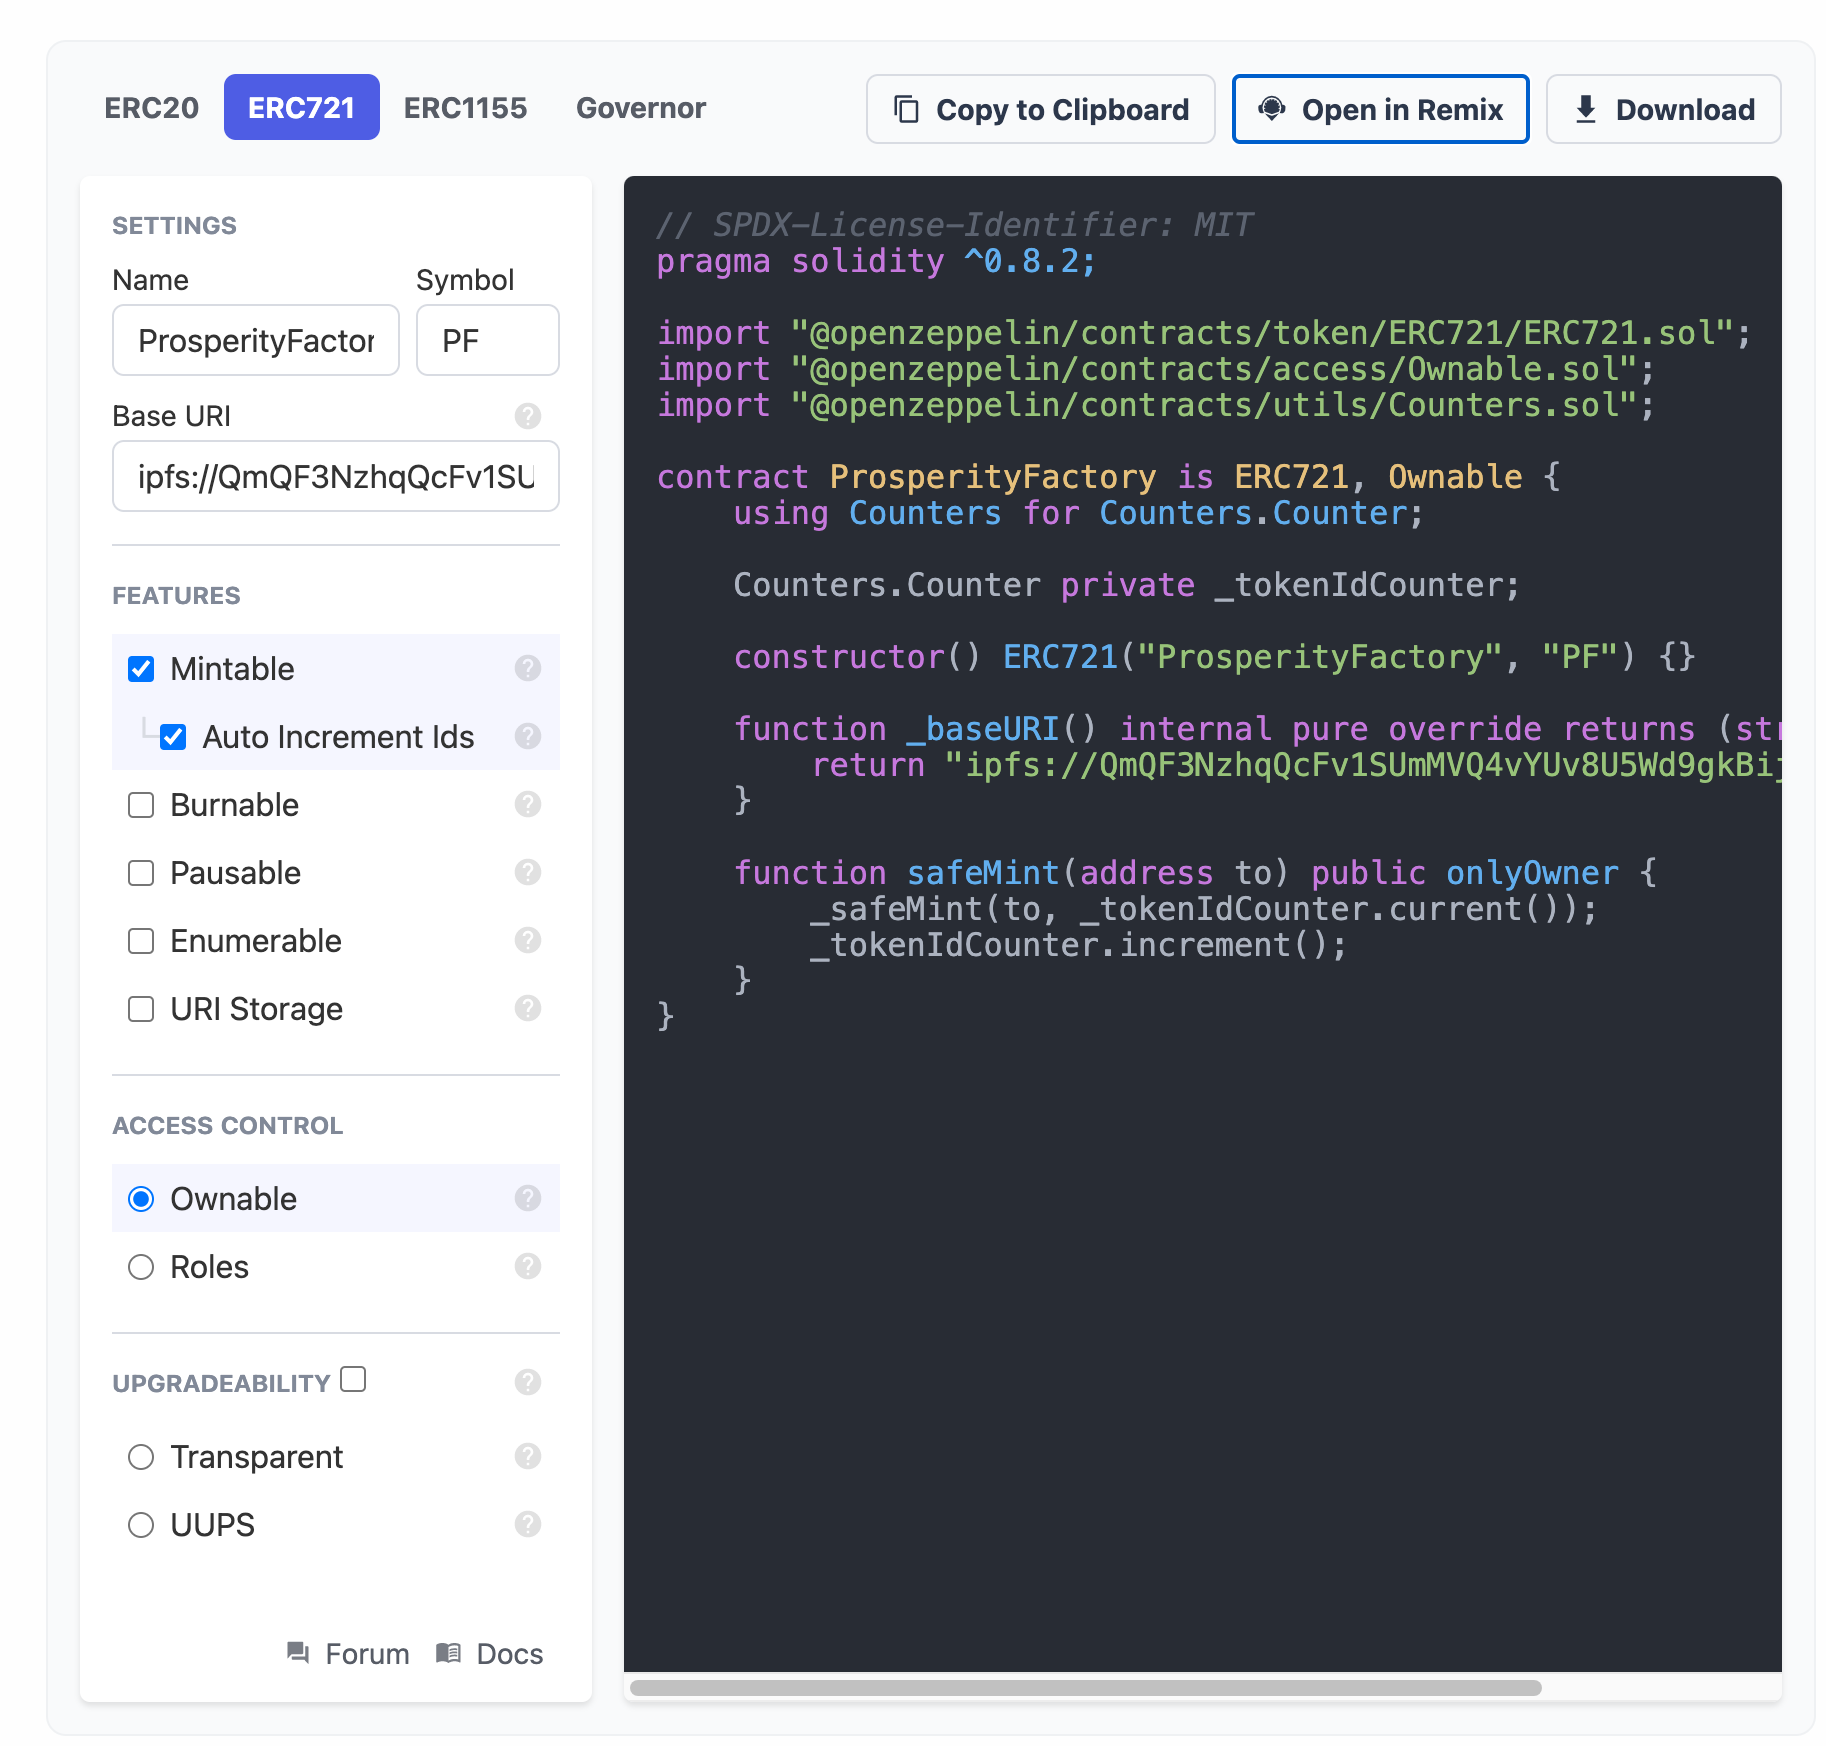
- Select ERC721 as your token choice.
- Enter your token information.
- We are calling our token the ProsperityFactory, symbol PF.
- We entered the IPFS CID of our token metadata folder (prosper factory metadata) in the “Base URI” field. Be sure to add a trailing “/” to the base URI, the token ID will be appended to the end of the base URI to get the IPFS metadata file. So the complete Base URI for our NFT contract is
ipfs://QmdmA3gwGukA8QDPH7Ypq1WAoVfX82nx7SaXFvh1T7UmvZ/. Again, you can view the folder here. - We made the token mintable and it will automatically increment the token IDs as the tokens are minted. The counter starts at 0 and adds 1 to each successive token. It is important that the file contents of the IPFS metadata folder are labeled accordingly (ie. 0-13) and correspond to the token IDs.
- The contract is also marked Ownable, meaning that only the owner of the contract (which is initially set to the account that deploys the contract) can mint new NFTs.
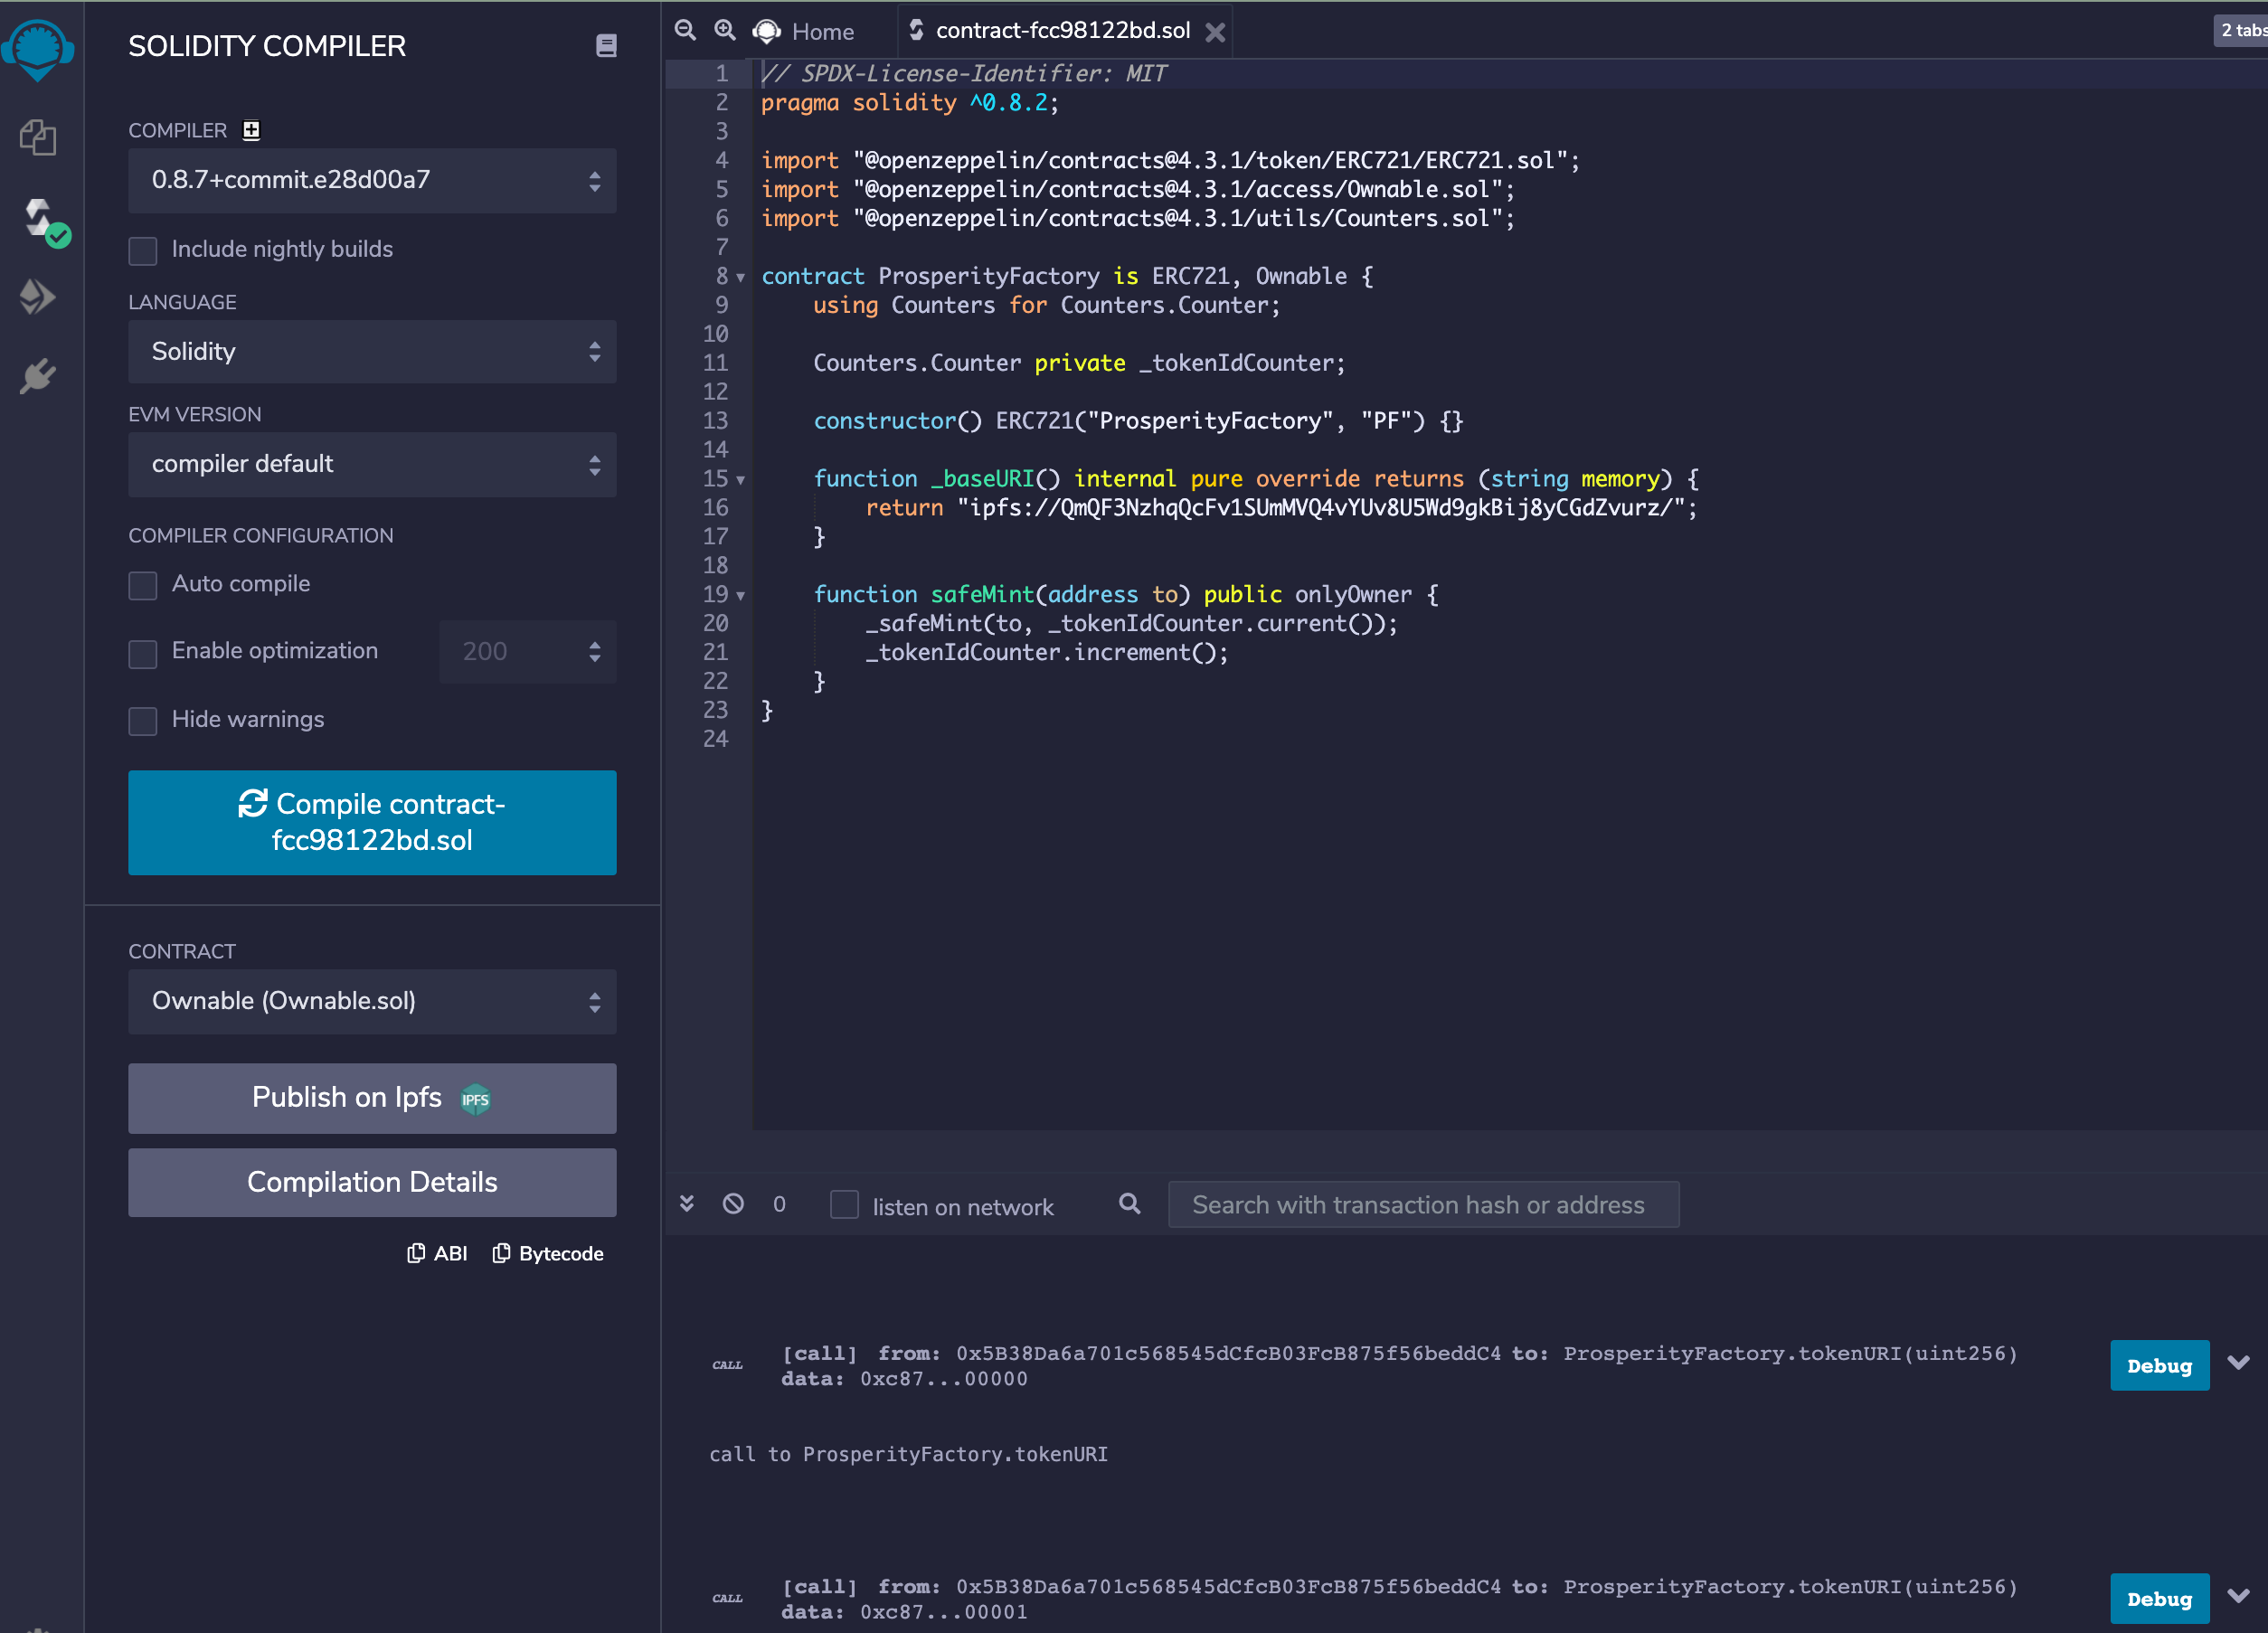
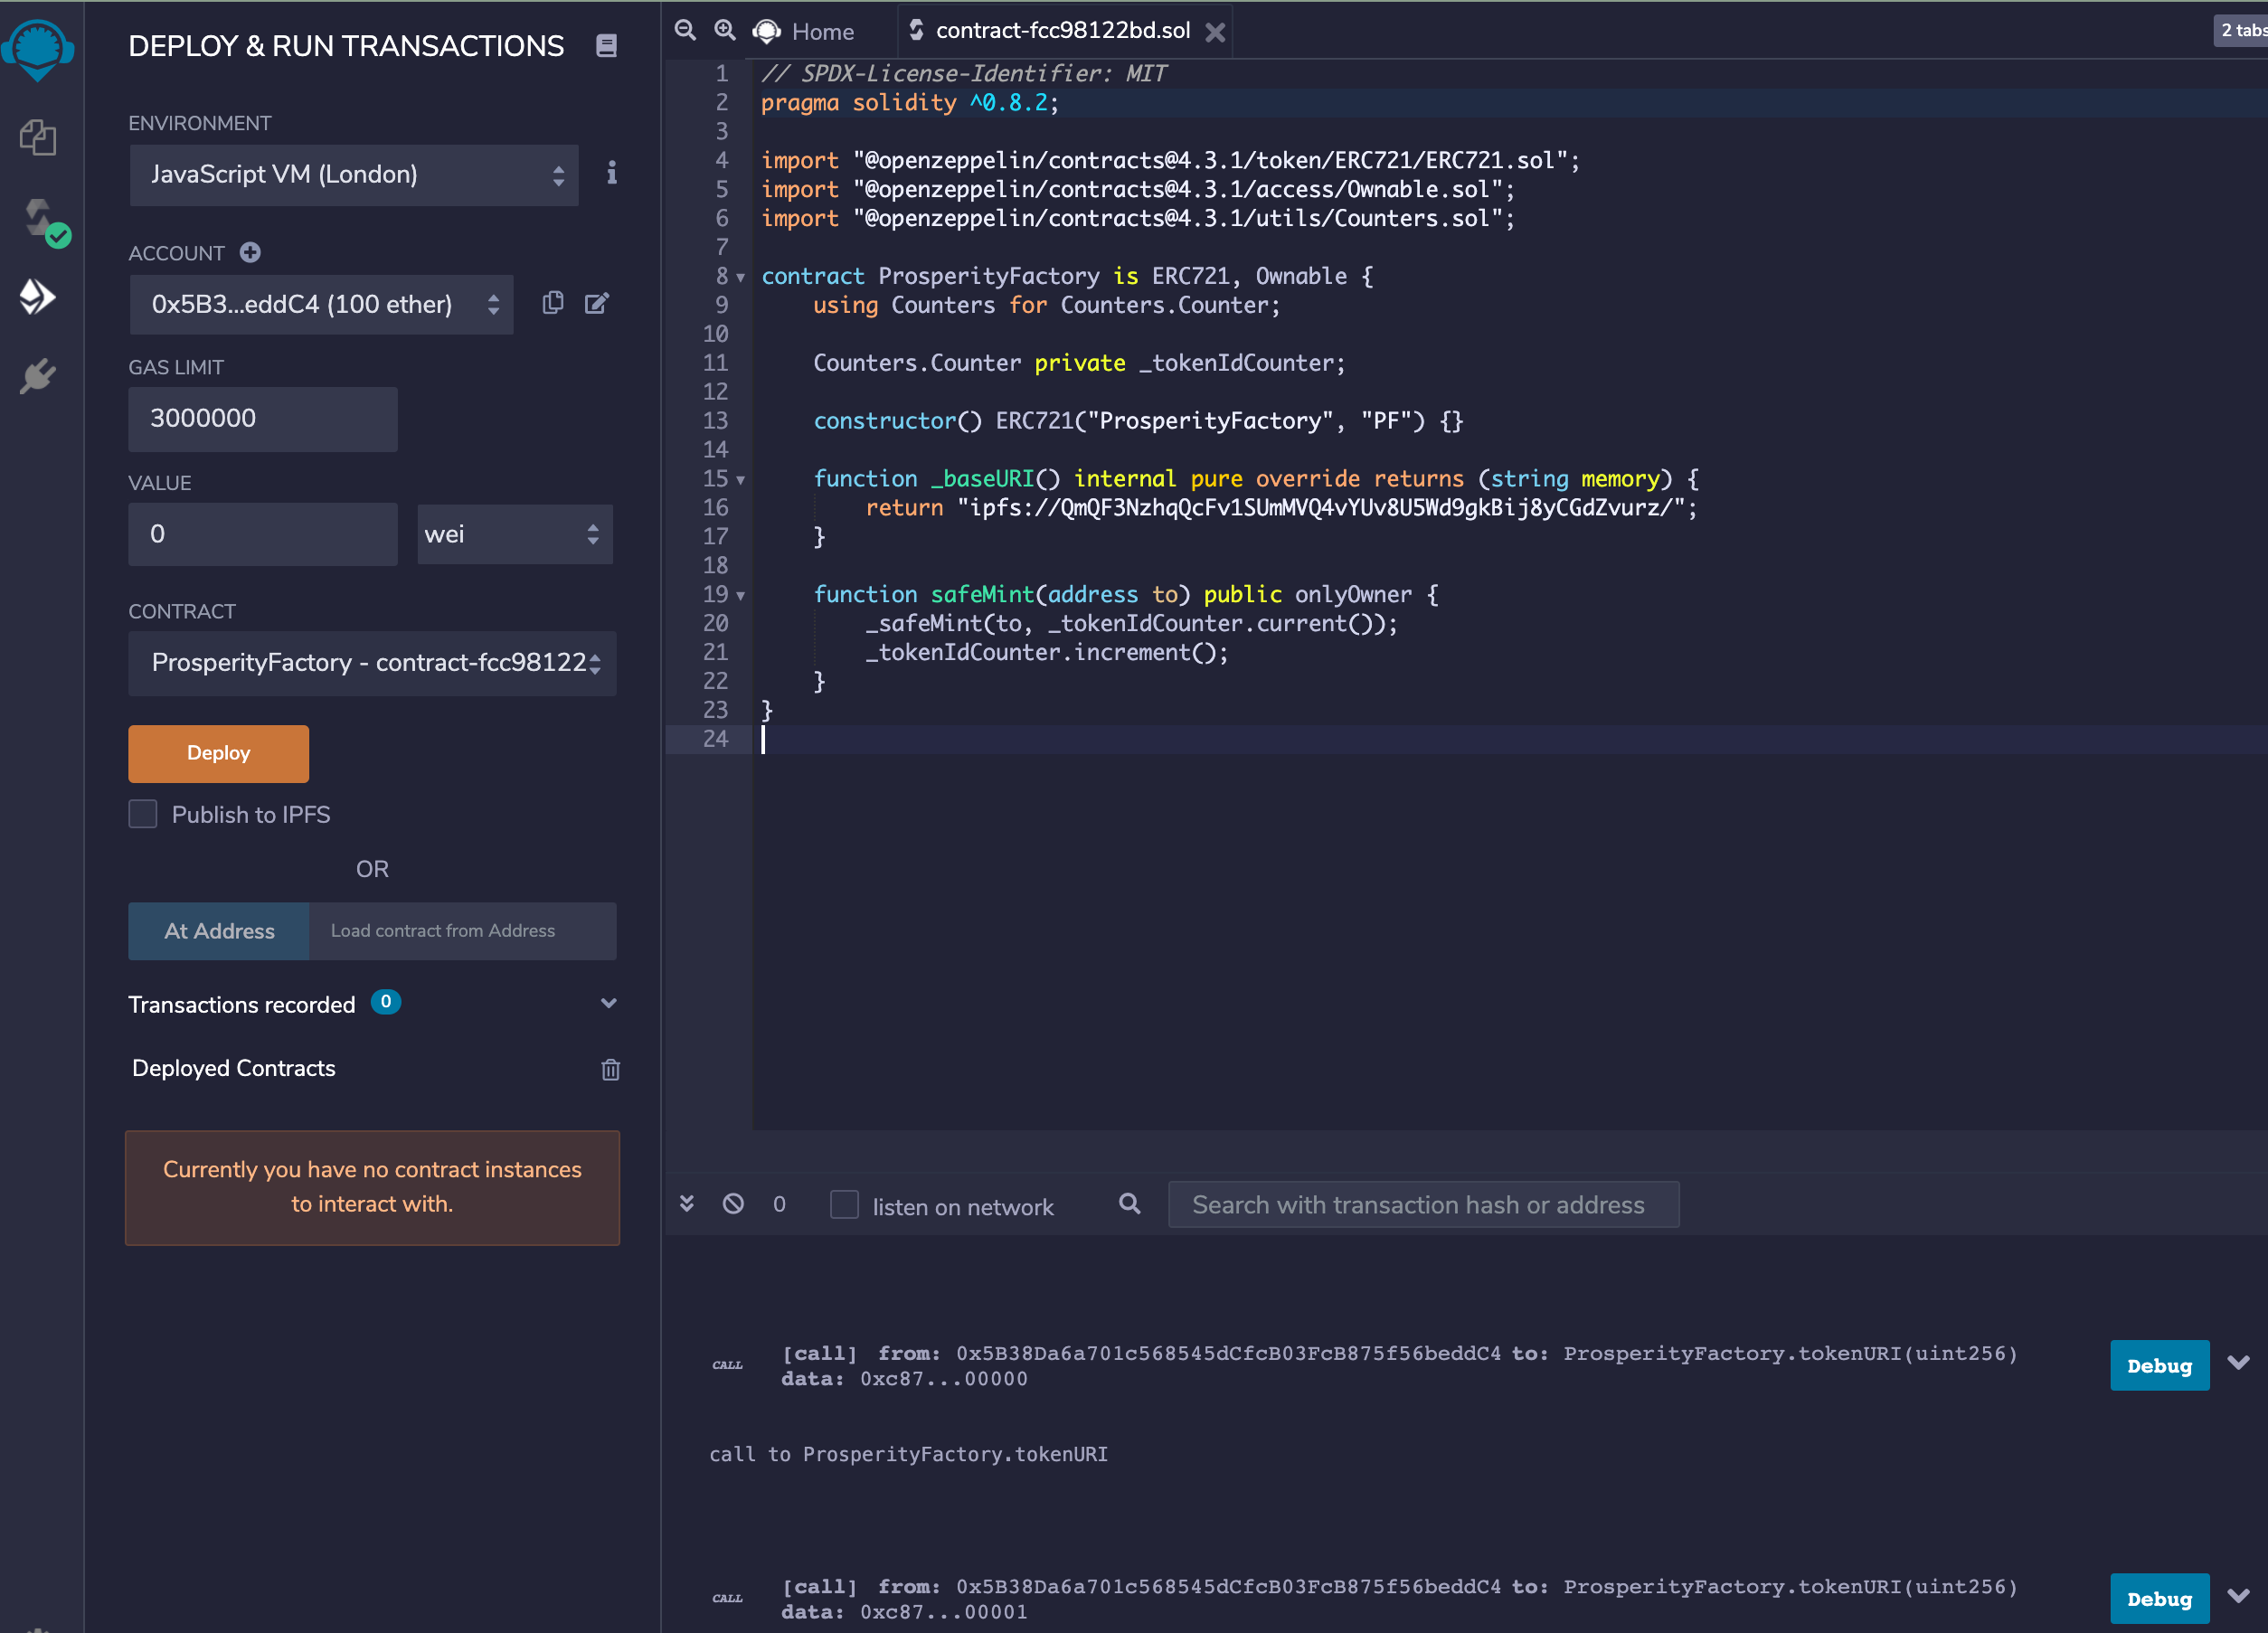
- Click “Open in Remix”. Remix will pop open with your contract code already filled in.
- Click the big blue button on the left side of Remix that says “Compile contract-xxxx.sol”.
- Once the contract is compiled, click the Ethereum logo on the left side of the window. A new sidebar will appear.
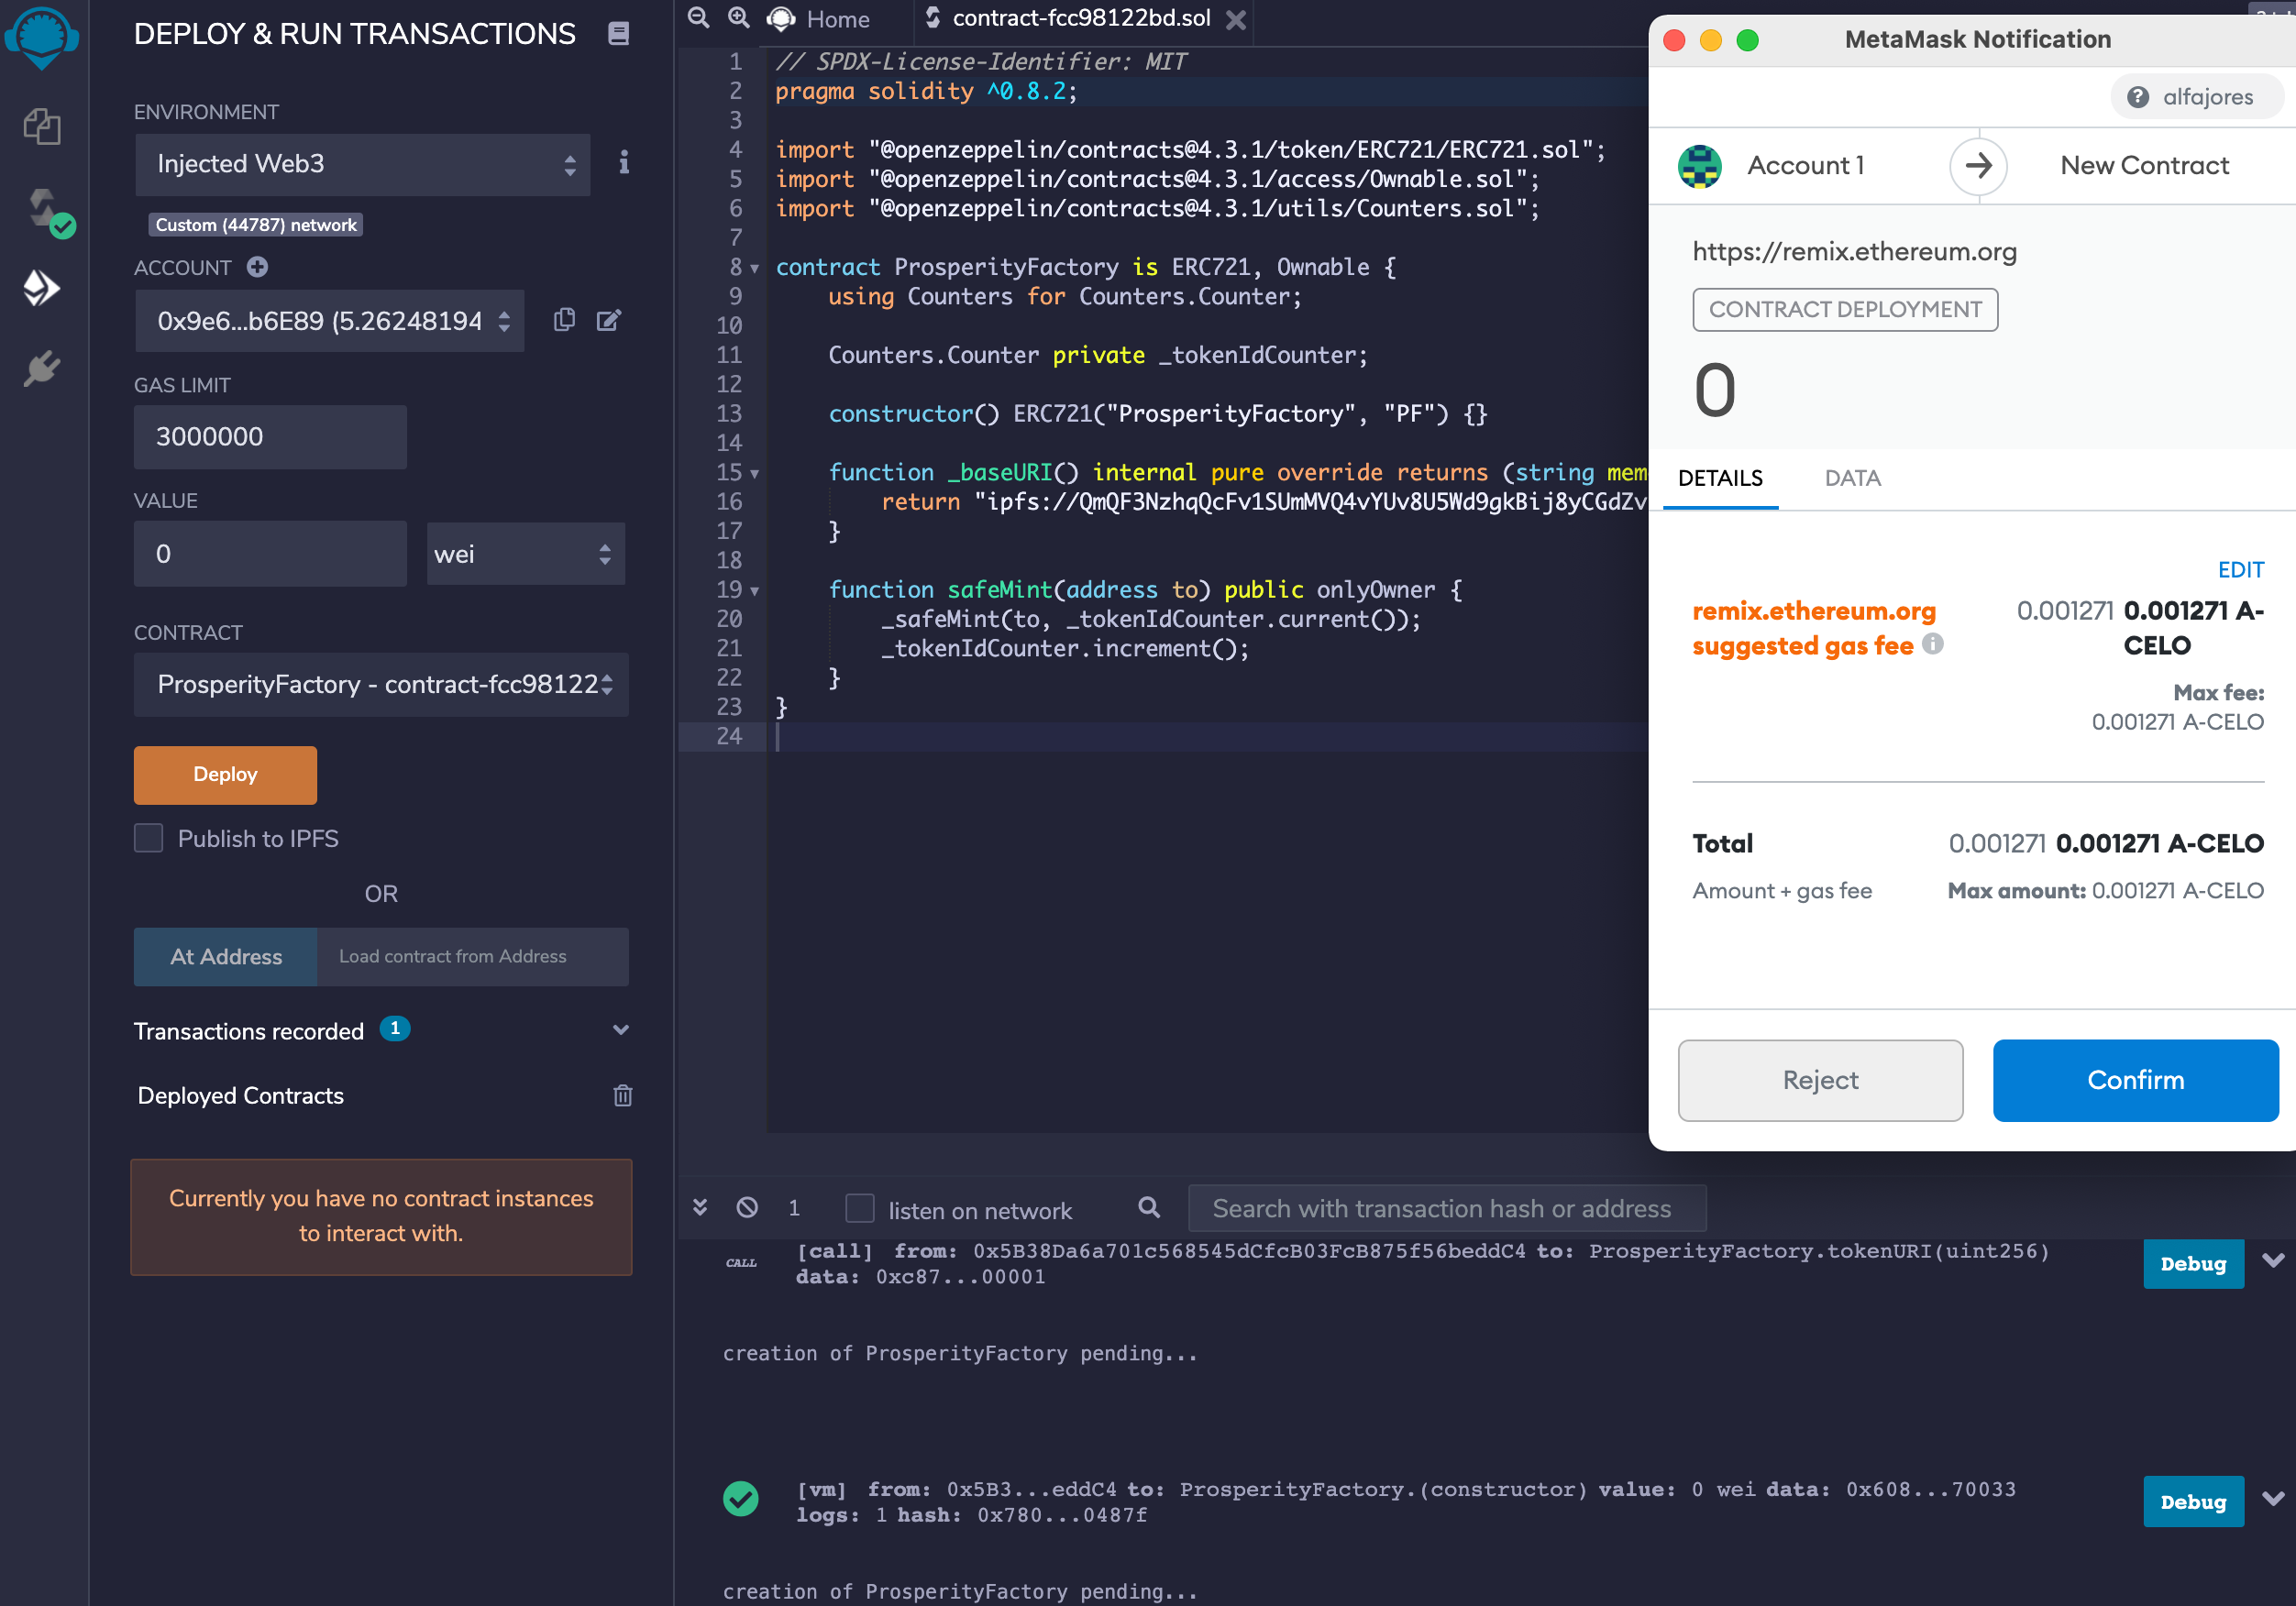
- In the “Environment” dropdown, select “Injected Web3”. This will connect Remix and Metamask. Make sure that Metamask is connected to the correct network. In this example, We are deploying to the Alfajores testnet, so we see a textbox below the dropdown that says
Custom (44787) network. 44787 is the network id for Alfajores.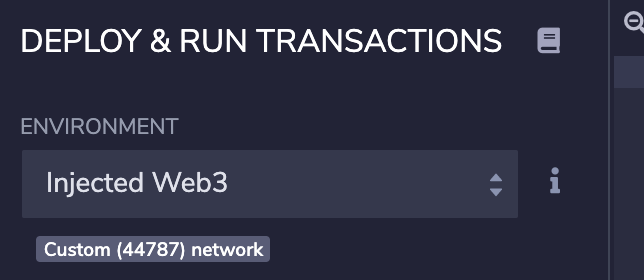
- Select the contract that you want to deploy. We titled the contract the ProsperityFactory.
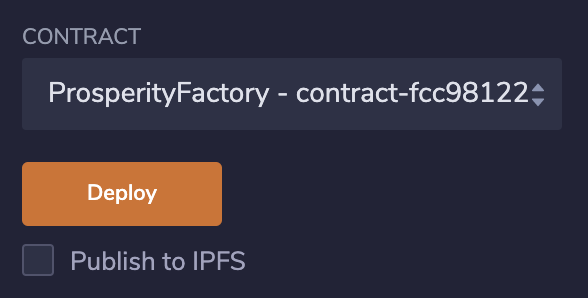
- Click Deploy. Metamask will pop up asking you to confirm the transaction.
- Once the contract is deployed, Remix will show a newly deployed contract on the bottom left corner of the window. Expand the ProsperityFactory dropdown to see all of the contract functions. You can see the deployed ProsperityFactory NFT contract here.
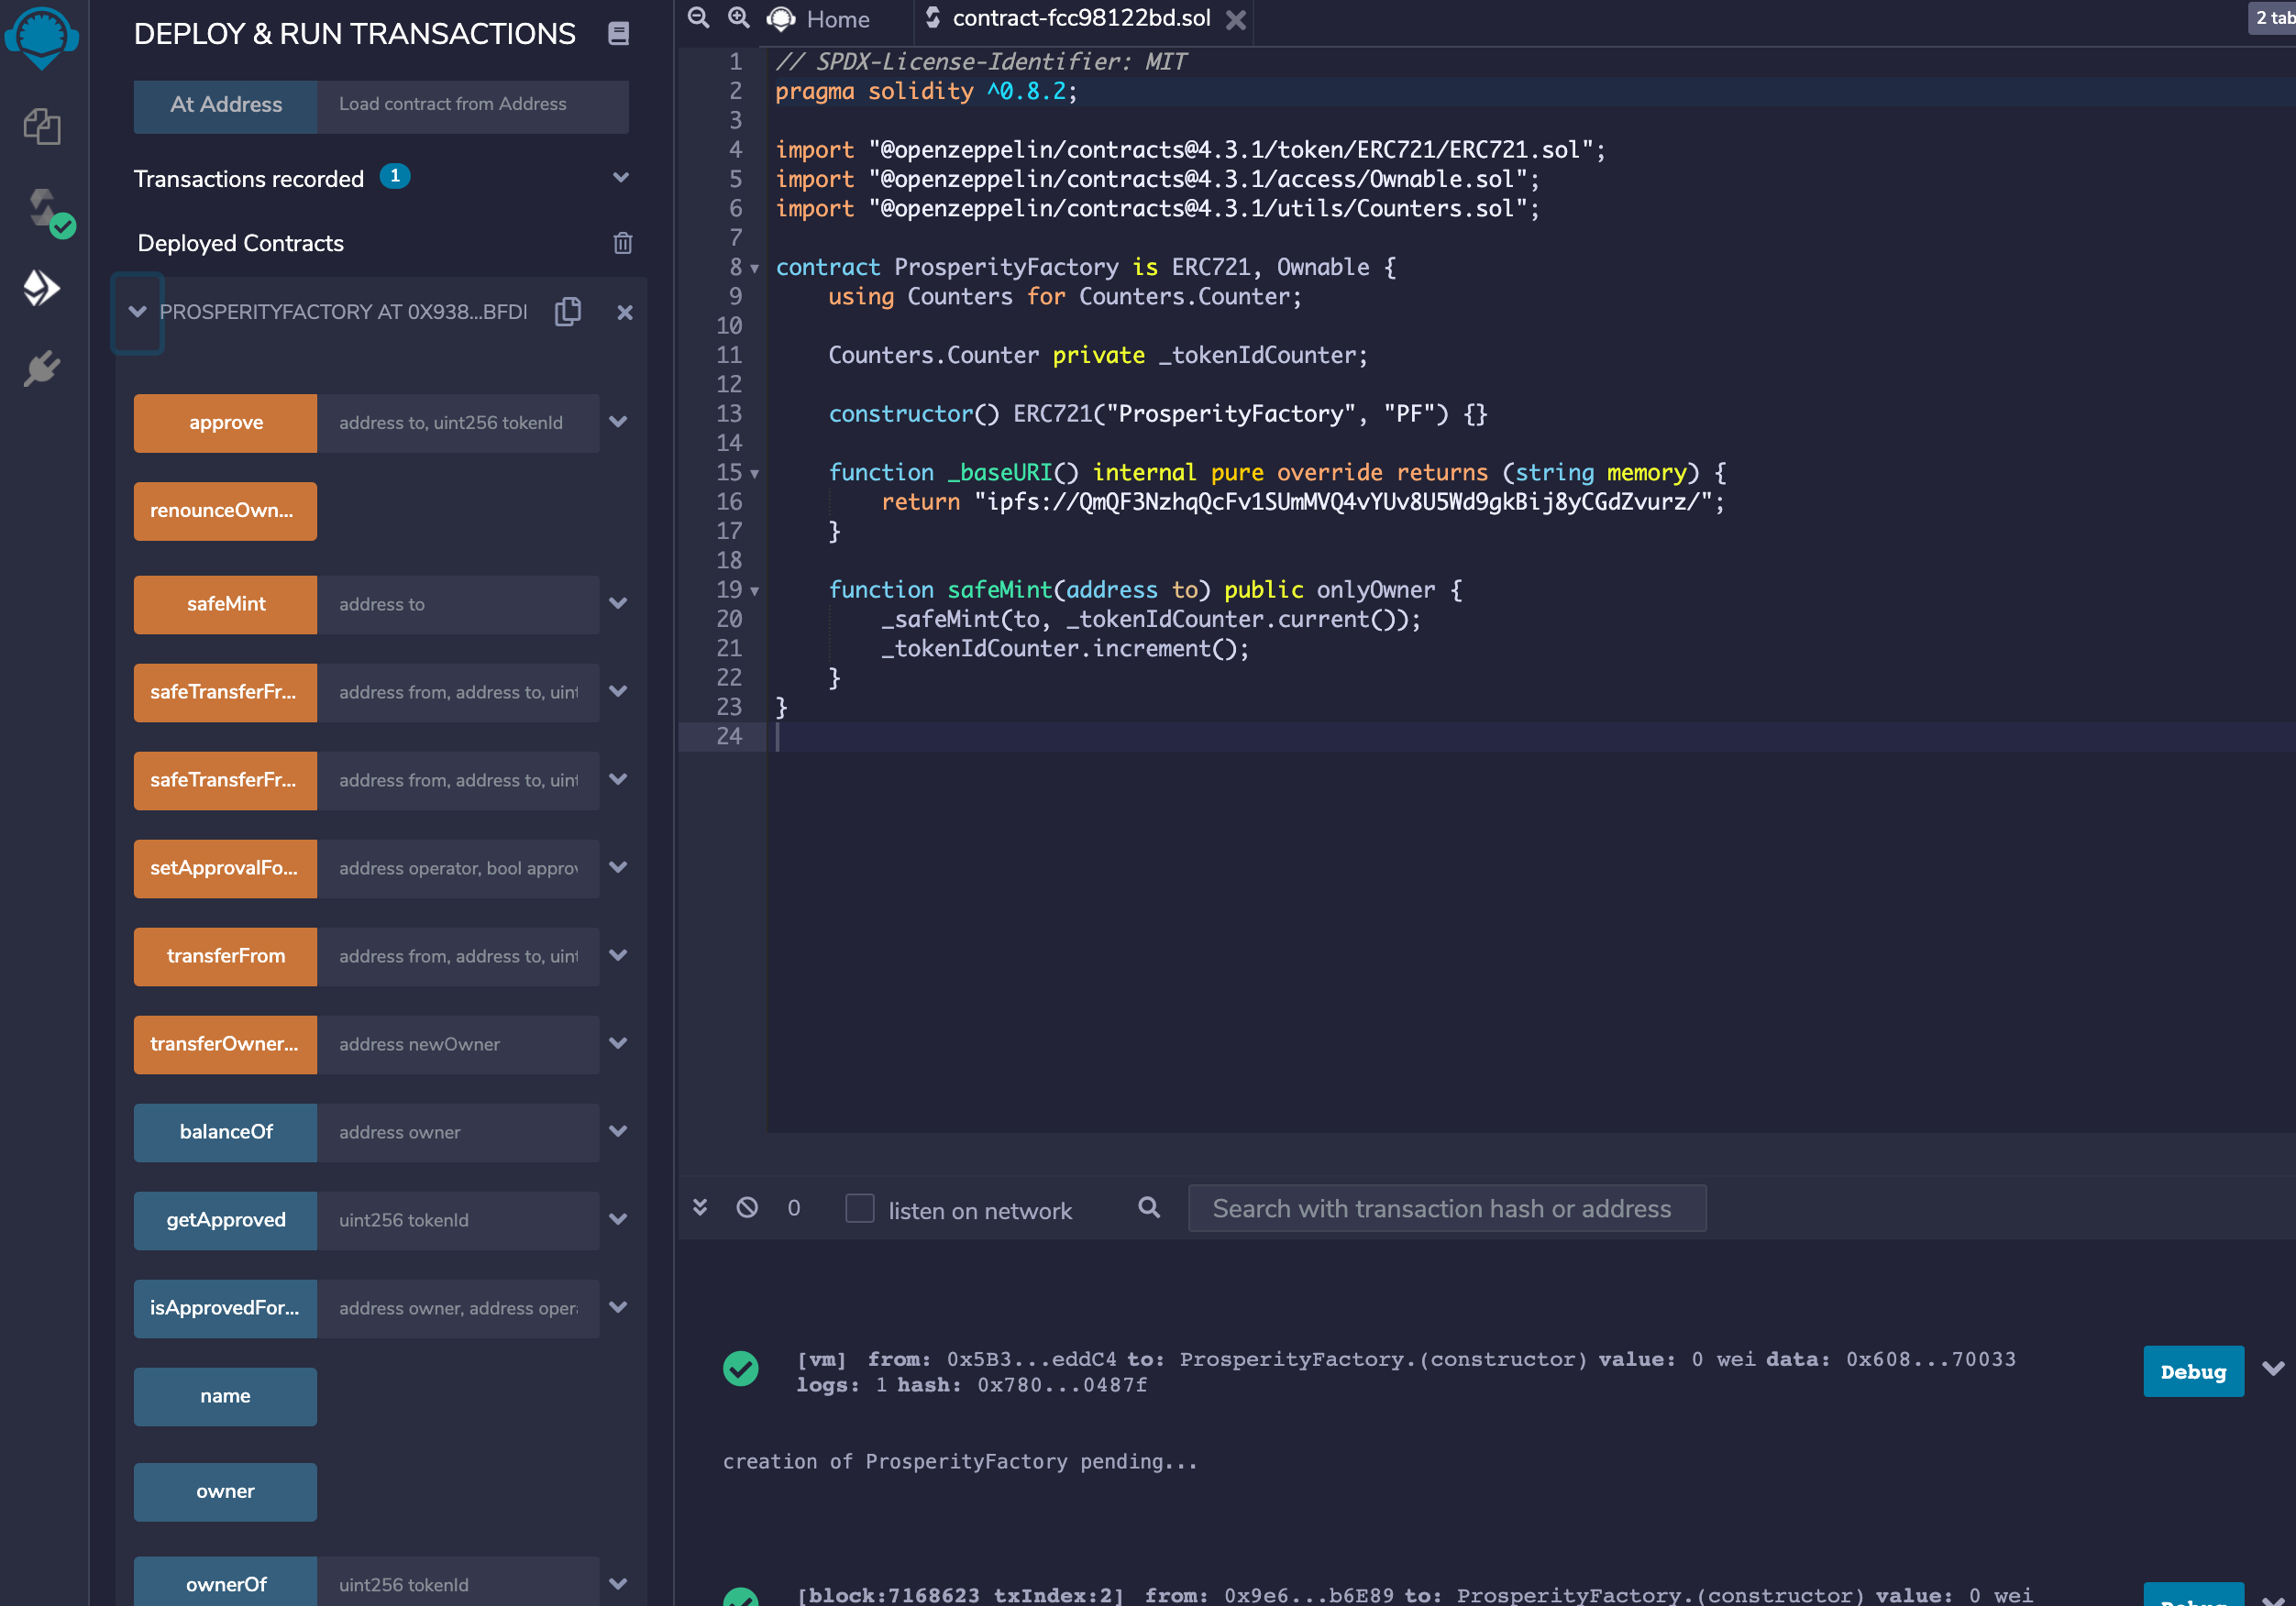
- Let’s mint the first NFT. To do that we will call the safeMint function. The safeMint function needs an account address as an input, so it knows who to mint the token to. I’ll just enter the first Metamask address and click the orange button. Metamask will pop up, confirm the transaction. When the transaction is confirmed, this will have minted the first NFT, with token ID 0.

- Check the token metadata. You can verify that the token was minted by calling the “tokenURI” function with the expected token ID. We call the contract with token ID 0 and it returns an IPFS reference.
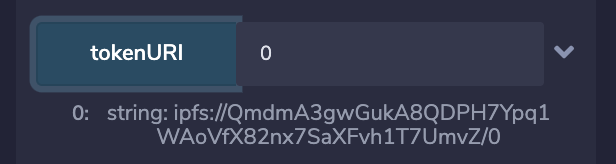
- Navigating to this IPFS reference will show the token metadata for that NFT.

- Going to that IPFS reference will show the image for the token.
We went through the same process and minted all 14 NFTs from this contract.
That’s it! You now know how to create your own NFT contract with corresponding metadata!
Let me know what you end up building and reach out if you have any questions, @critesjosh_ on Twitter or joshc#0001 on Discord. Join the Celo discord at https://chat.celo.org.