Deploy on Celo with Hardhat
How to deploy a smart contract to Celo testnet, mainnet, or a local network using Hardhat.
Hardhat is a development environment to compile, deploy, test, and debug your Ethereum or Celo software. It helps developers manage and automate the recurring tasks that are inherent to the process of building smart contracts and dApps, as well as easily introducing more functionality around this workflow. This means compiling, running, and testing smart contracts at the very core.
Prerequisites#
To deploy on Celo using Hardhat, you should have Celo set up Celo in your local environment. If you prefer to deploy without a local environment, you can deploy using Remix or Replit.
Create Hardhat Project#
Choose one of the following items to prepare a dApp to deploy on Celo.
- Follow the installation instructions and quickstart to build and deploy your smart contract.
Update the hardhat.config.js file#
Open hardhat-config.js in a text editor and replace its contents with this Celo configuration code. This code is similar to Hardhat settings with a few configuration updates needed to deploy to a Celo network.
Connect to Local Network#
Using Celo Ganache CLI creates test accounts at the localhost on port 7545. The private network setup connects to your localhost on this port and gives you access to your accounts on ganache-cli.
localhost: { url: "http://127.0.0.1:7545" },tip
If you choose to Set up a Local Development Chain, your blockchain will also be hosted on a private network on localhost. This same configuration can be used to connect to the local development chain.
Connect to Testnet using Forno#
Using Forno allows you to connect to the Celo test blockchain without running a local node. The testnet configuration uses Forno to connect you to the Celo Testnet (Alfajores) using HDWalletProvider and the mnemonic stored in your .env file.
alfajores: { url: "https://alfajores-forno.celo-testnet.org", accounts: { mnemonic: process.env.MNEMONIC, path: "m/44'/52752'/0'/0" }, chainId: 44787 }note
Celo uses a different account derivation path than Ethereum, so you have to specify "m/44'/52752'/0'/0" as the path.
Connect to Mainnet using Forno#
Using Forno also allows you to connect to the Celo main blockchain without running a local node. The mainnet configuration uses Forno to connect you to the Celo Mainnet using HDWalletProvider and the mnemonic stored in your .env file.
celo: { url: "https://forno.celo.org", accounts: { mnemonic: process.env.MNEMONIC, path: "m/44'/52752'/0'/0" }, chainId: 42220 }tip
Forno is a cLabs hosted node service for interacting with the Celo network. This allows you to connect to the Celo Blockchain without having to run your own node.
Deploy to Celo#
Run the following command from your root project directory to deploy to Celo Alfajores testnet.
npx hardhat run scripts/sample-script.js --network alfajores...or run this command to deploy to Celo mainnet.
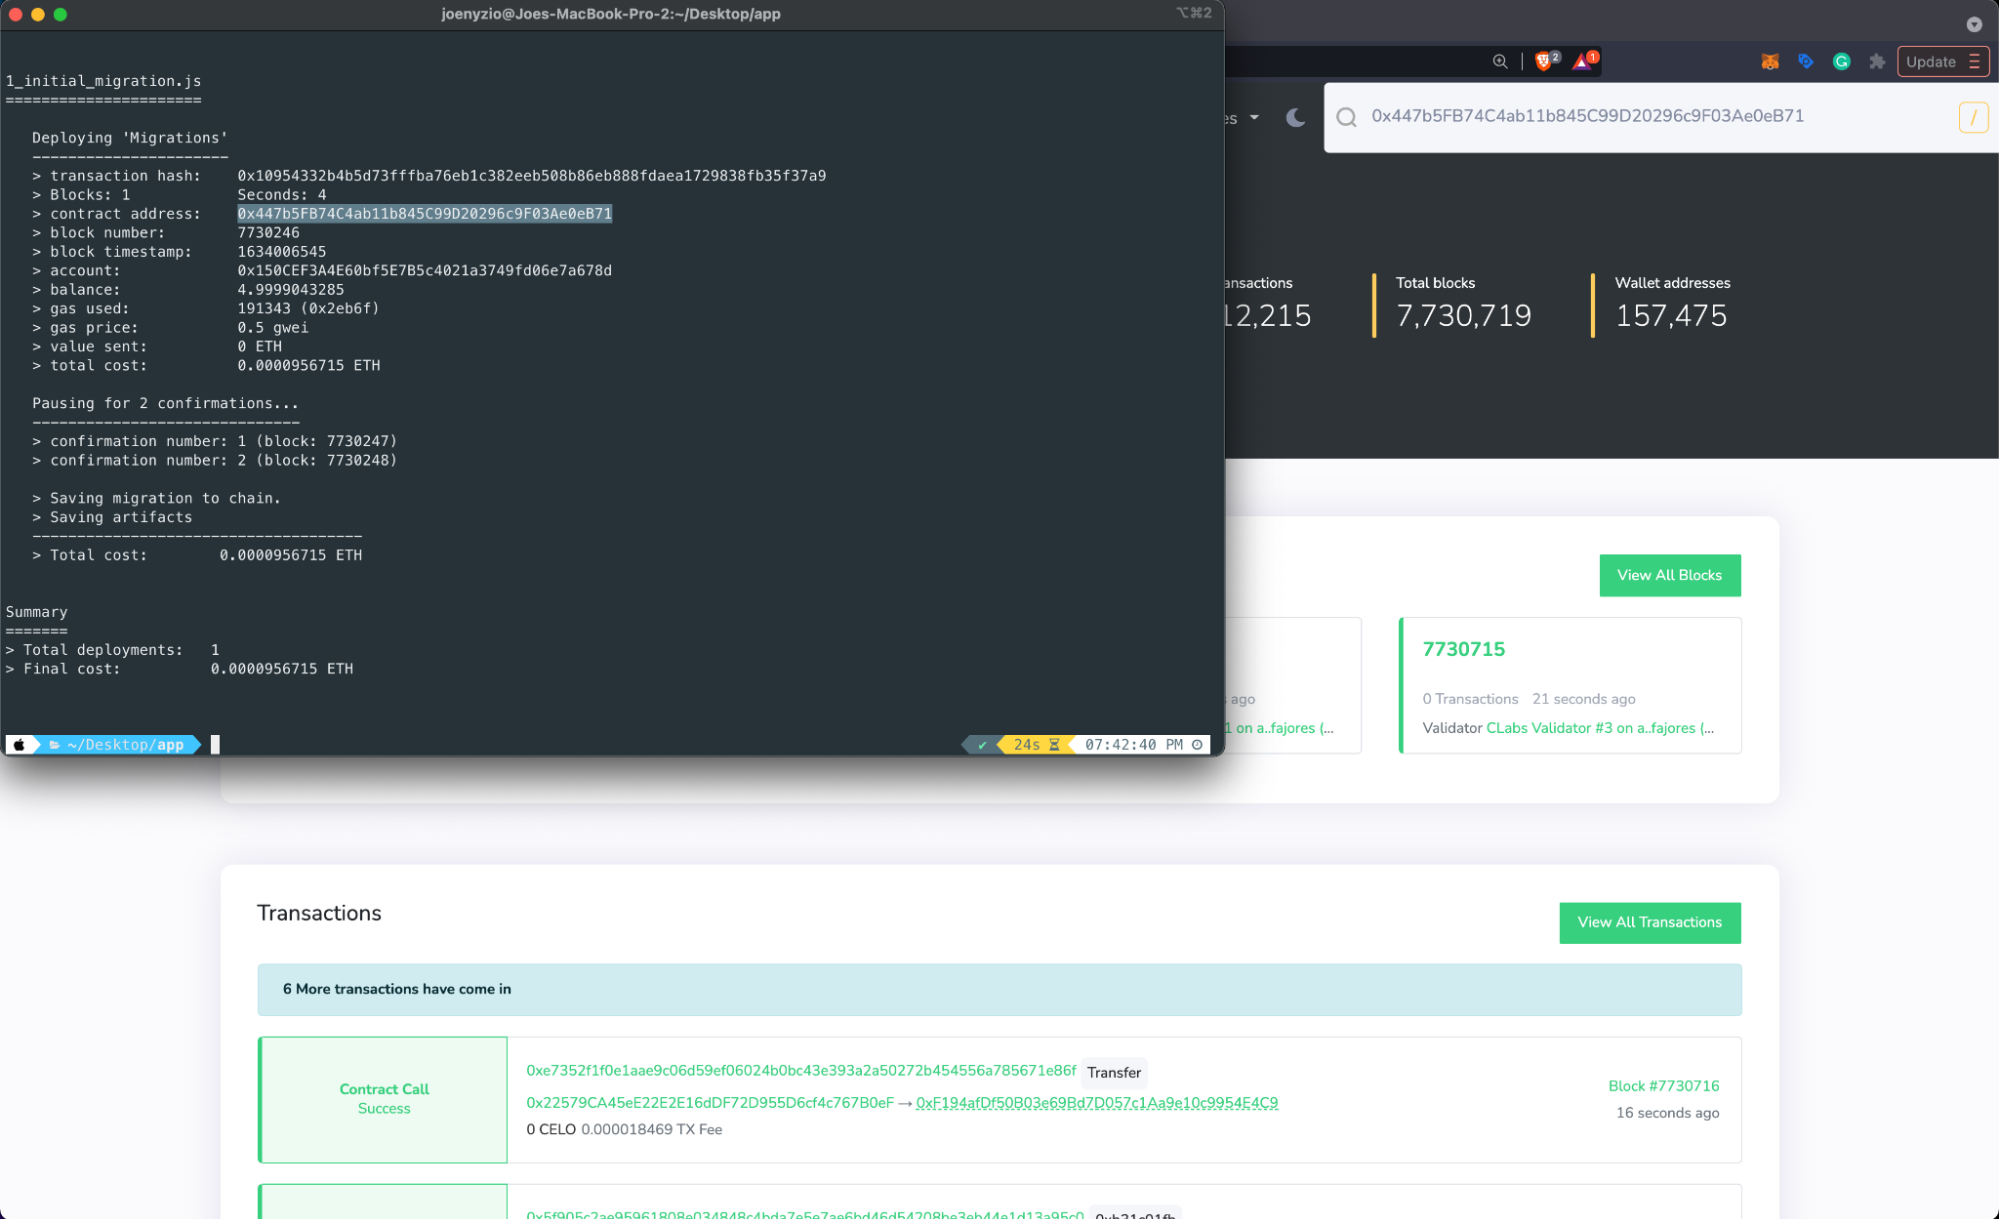
npx hardhat run scripts/sample-script.js --network celoView Contract Deployment#
Copy your contract address from the terminal and navigate to the block explorer to search for your deployed contract. Switch between networks to find your contract using the dropdown by the search bar.
tip
Learn more about building and deploying dApps using the HardHat documentation.
Verify Smart Contract#
Using Blockscout#
Verifying a smart contract allows developers to review your code from within the Celo Block Explorer.
- Navigate to the Code tab at the Explorer page for your contract's address
- Click Verify & Publish to enter the smart contract verification page

- Upload your smart contract (example: HelloCelo.sol) and it’s .json file (example: HelloCelo.json) found in build > contracts folder.
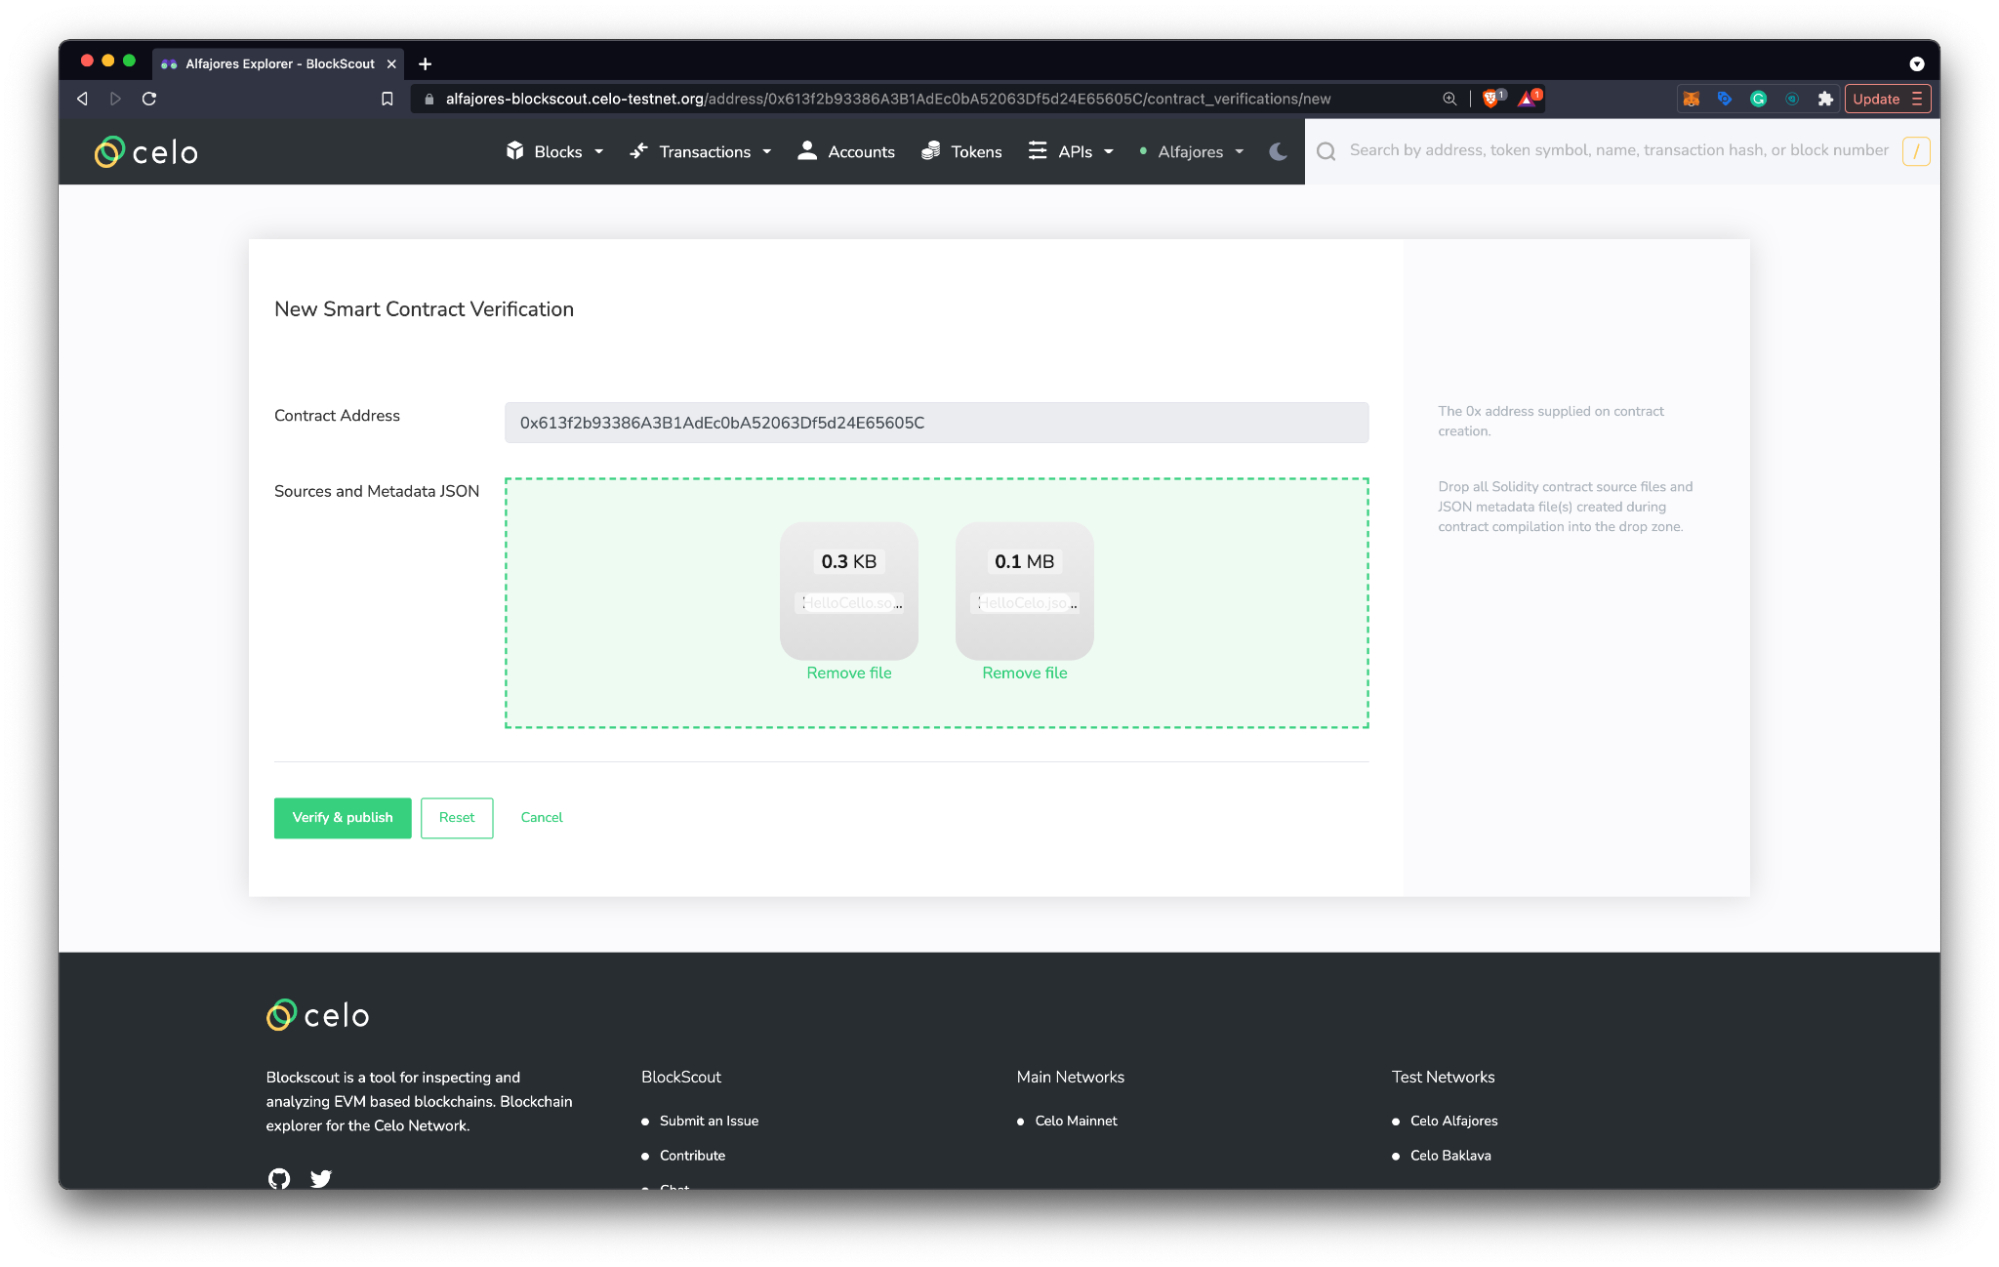
- Click Verify & Publish
- Navigate to the Contract Address Details Page in the block explore to, use the Code, Read Contract, and Write Contract panels to view and interact with your deployed smart contract.
Using the hardhat plugin#
You can also verify your contracts programatically using the hardhat-deploy plugin.
First, install the plugin in your project with
npm install -D hardhat-deploythen add the following line to your hardhat.config.js file.
require('hardhat-deploy');Now you can verify your contracts on sourcify and Blockscout with
hardhat --network alfajores sourcifyjust be sure to replace the network flag with the appropriate network.